Prepare Ubuntu 26.04 for Spatial Ecology courses
In order to execute the Spatial Ecology exercise we will need first install the Ubuntu 26.04 Resolute Raccoon Linux Virtual Machine and then populate with additional software and data.
Ubuntu 26.04 Resolute Raccoon is a Linux Virtual Machine, that allows you to try a wide variety of open source geospatial software previous installation anything. It is composed entirely of free software, allowing it to be freely distributed, duplicated and passed around.
You can follow the below instructions. Moreover the Ubuntu 26.04 LTS installation YouTube video even if use another VM image can be used to guide along the full procedure. Pay attention that the video is base on the Osgeolive 13 version, so some differences can be present comparing with the current Ubuntu 26.04 version.
Software requirements
For running a Virtual Machine in your OS we need a virtualization software such as Virtualbox and a vmdk or vdi file that contains the virtualized OS.
Hardware requirements
Hard disk
Be sure to have at least 60 GIGA of free space in your hard disk before to start the VM installation procedure. Avoid the use of USB-external-hard-disk, due that the USB connection will slow down the VM performance.
RAM
Be sure that your computer have at lest 16 GIGA ram (more better). Indeed with the VM running and the zoom session open for following the lecture the 16 GIGA will be barely on the limit.
Install Virtualbox
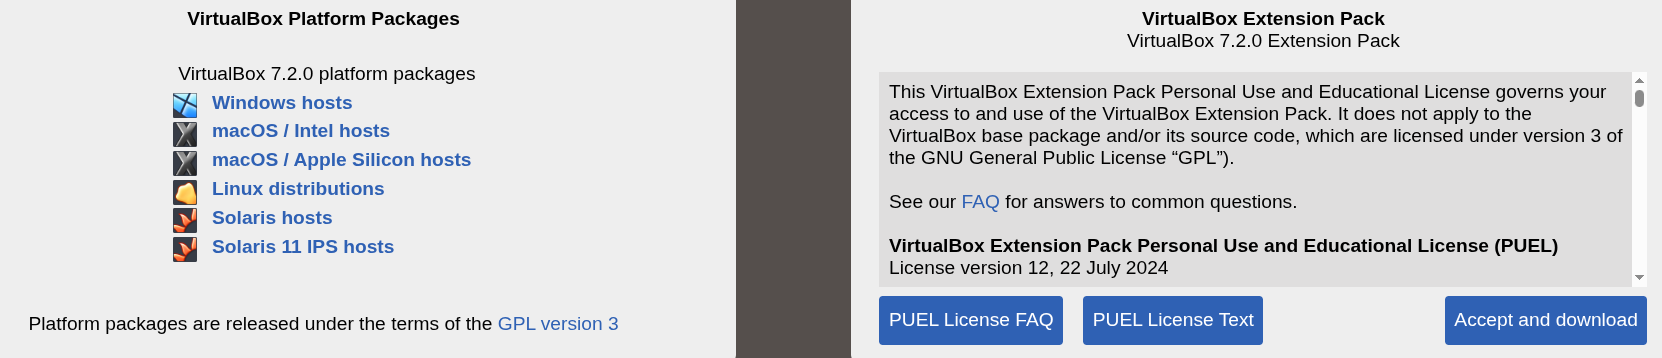
Open you browser and go to https://www.virtualbox.org/wiki/Downloads and base on your OS download the Virtualbox 7.2.16 executable and install it. Be sure you also install the VirtualBox 7.2.16 Extension Pack.
Install Ubuntu 26.04 LTS Resolute Raccoon
Download Ubuntu 26.04
Open you browser and go to Linux VM Images and proceed to download the Ubuntu 26.04 Resolute Raccoon for VirtualBox. This action will download the 64bit.7z file. The 64bit.7z is a quite large file therefore according to your Internet connection it can take several hours. When the download is finished unzipped using 7zip. Mac users can use The Unarchiver for unzip the 64bit.7z. A this point you are ready to load the Ubuntu 26.04 (64bit).vdi inside Virtualbox.
Install Ubuntu 26.04 inside Virtualbox
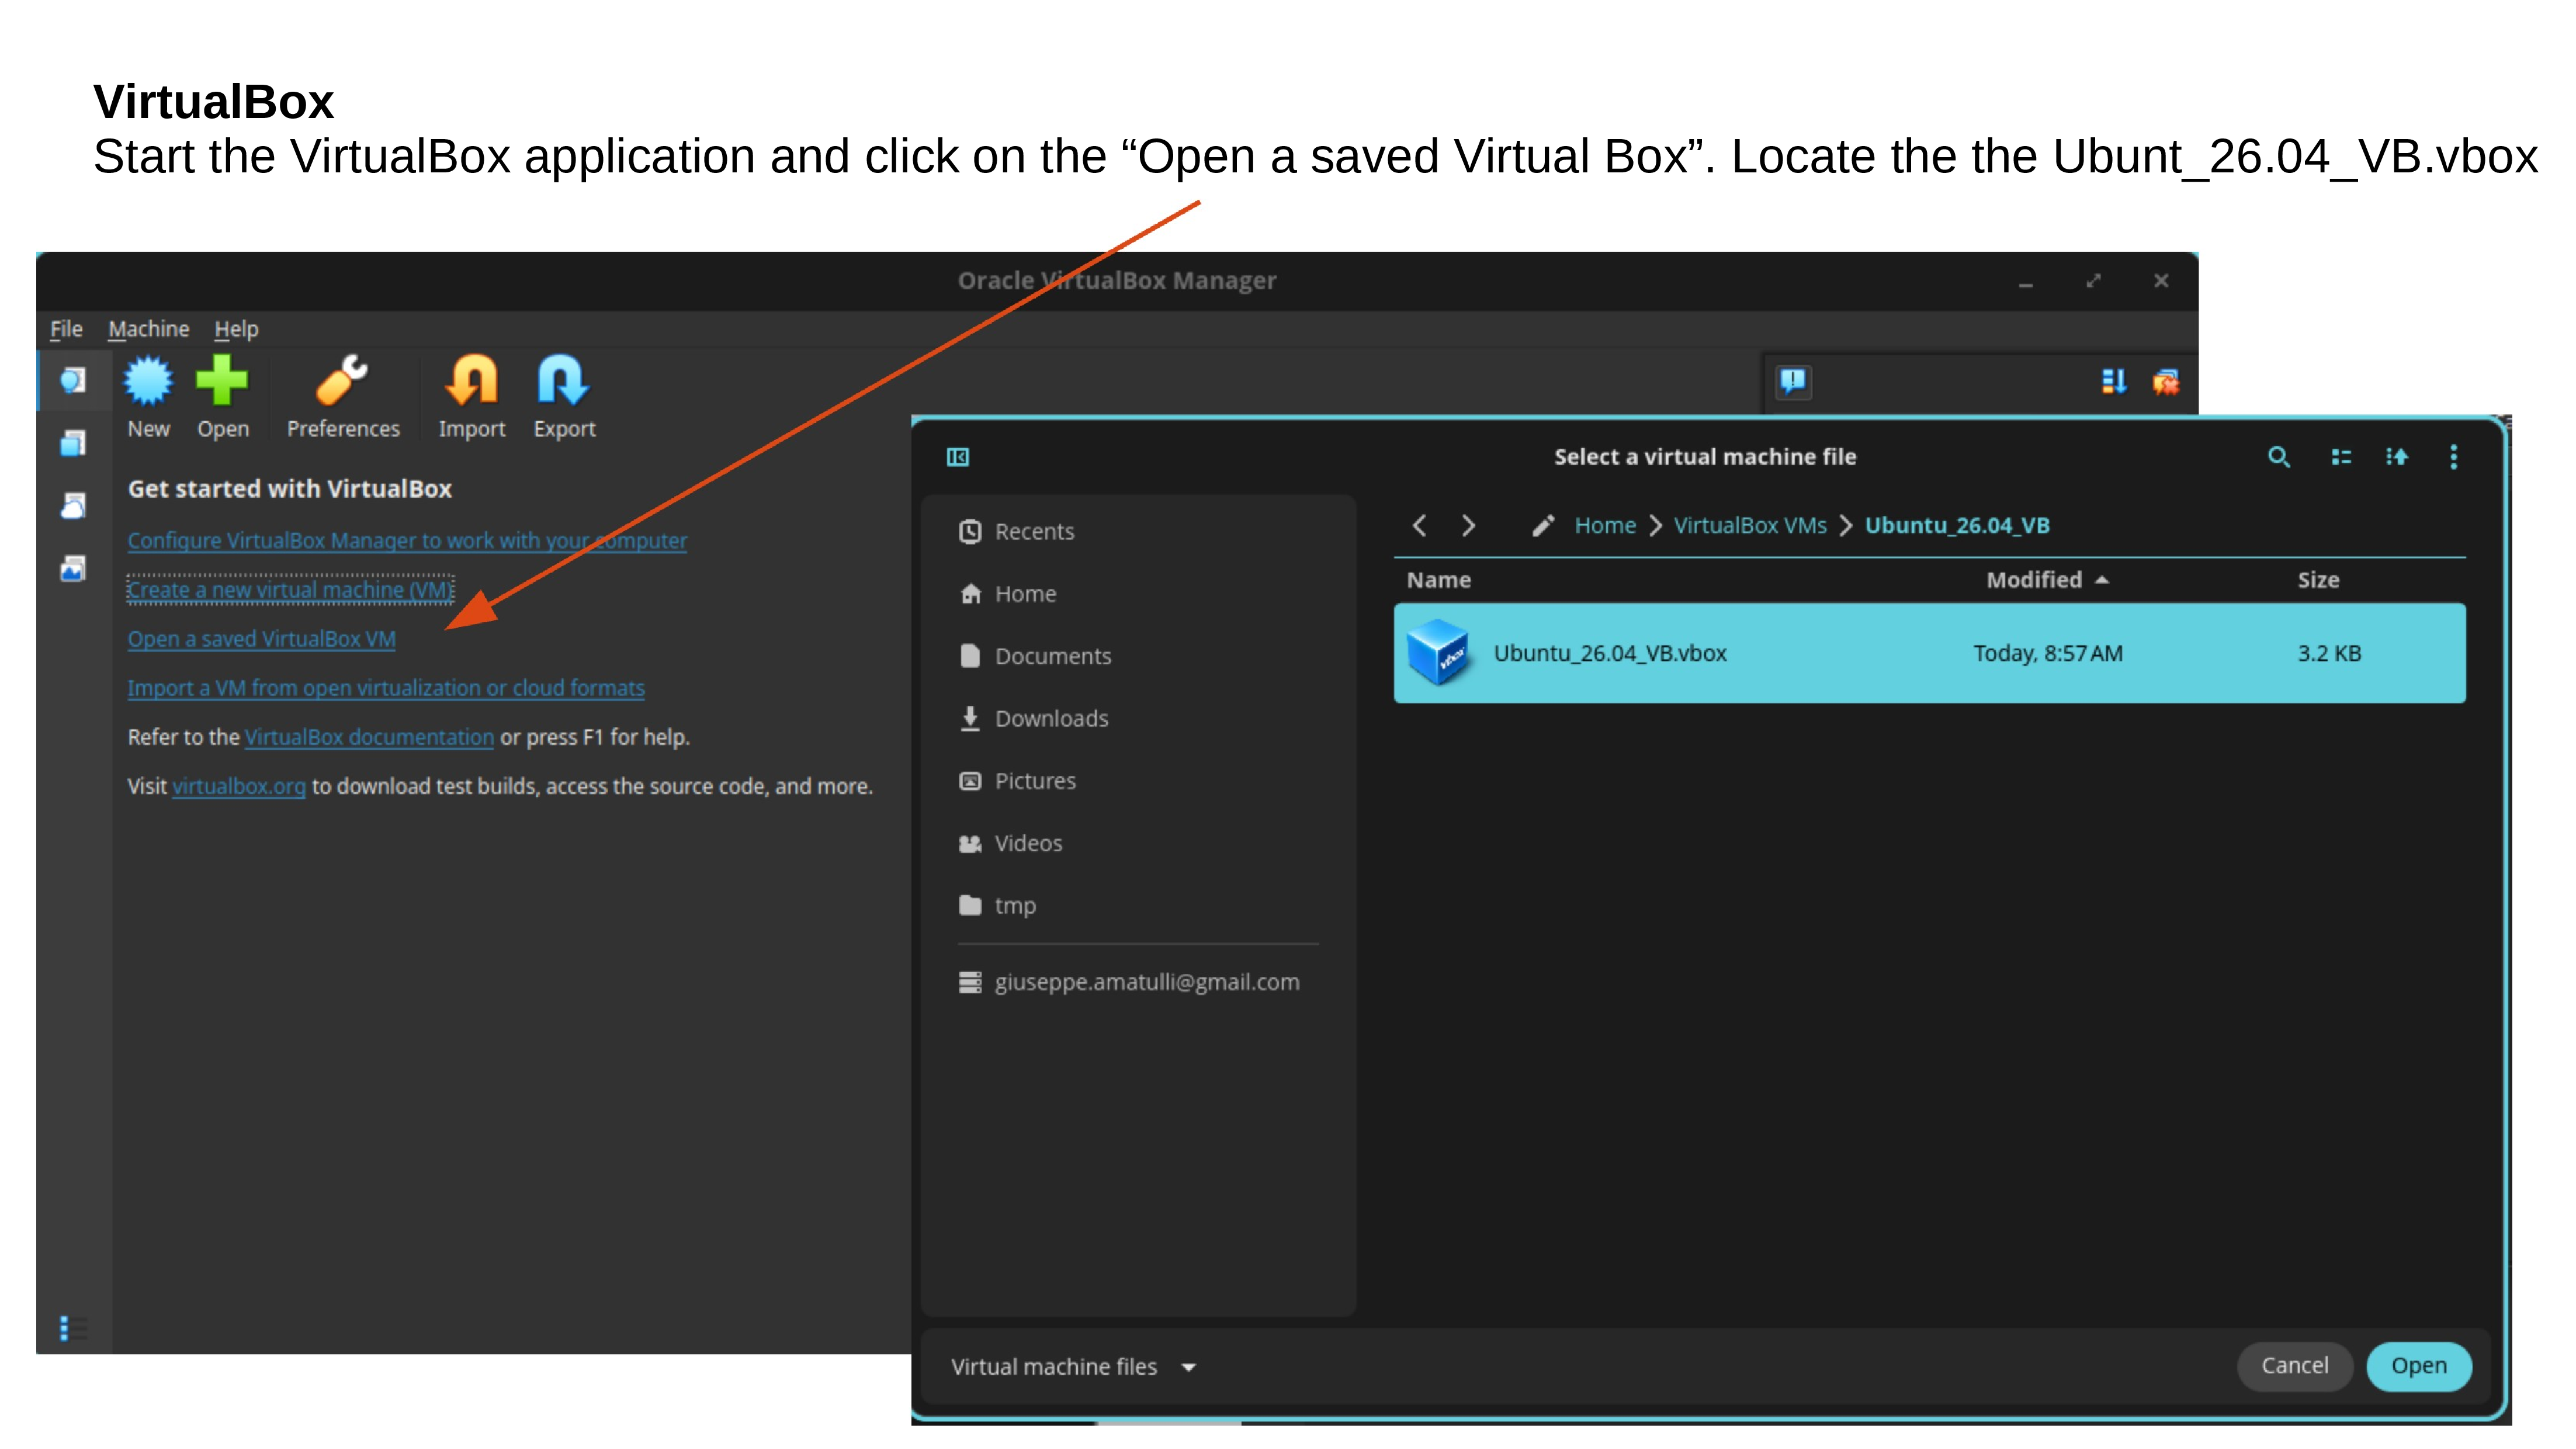
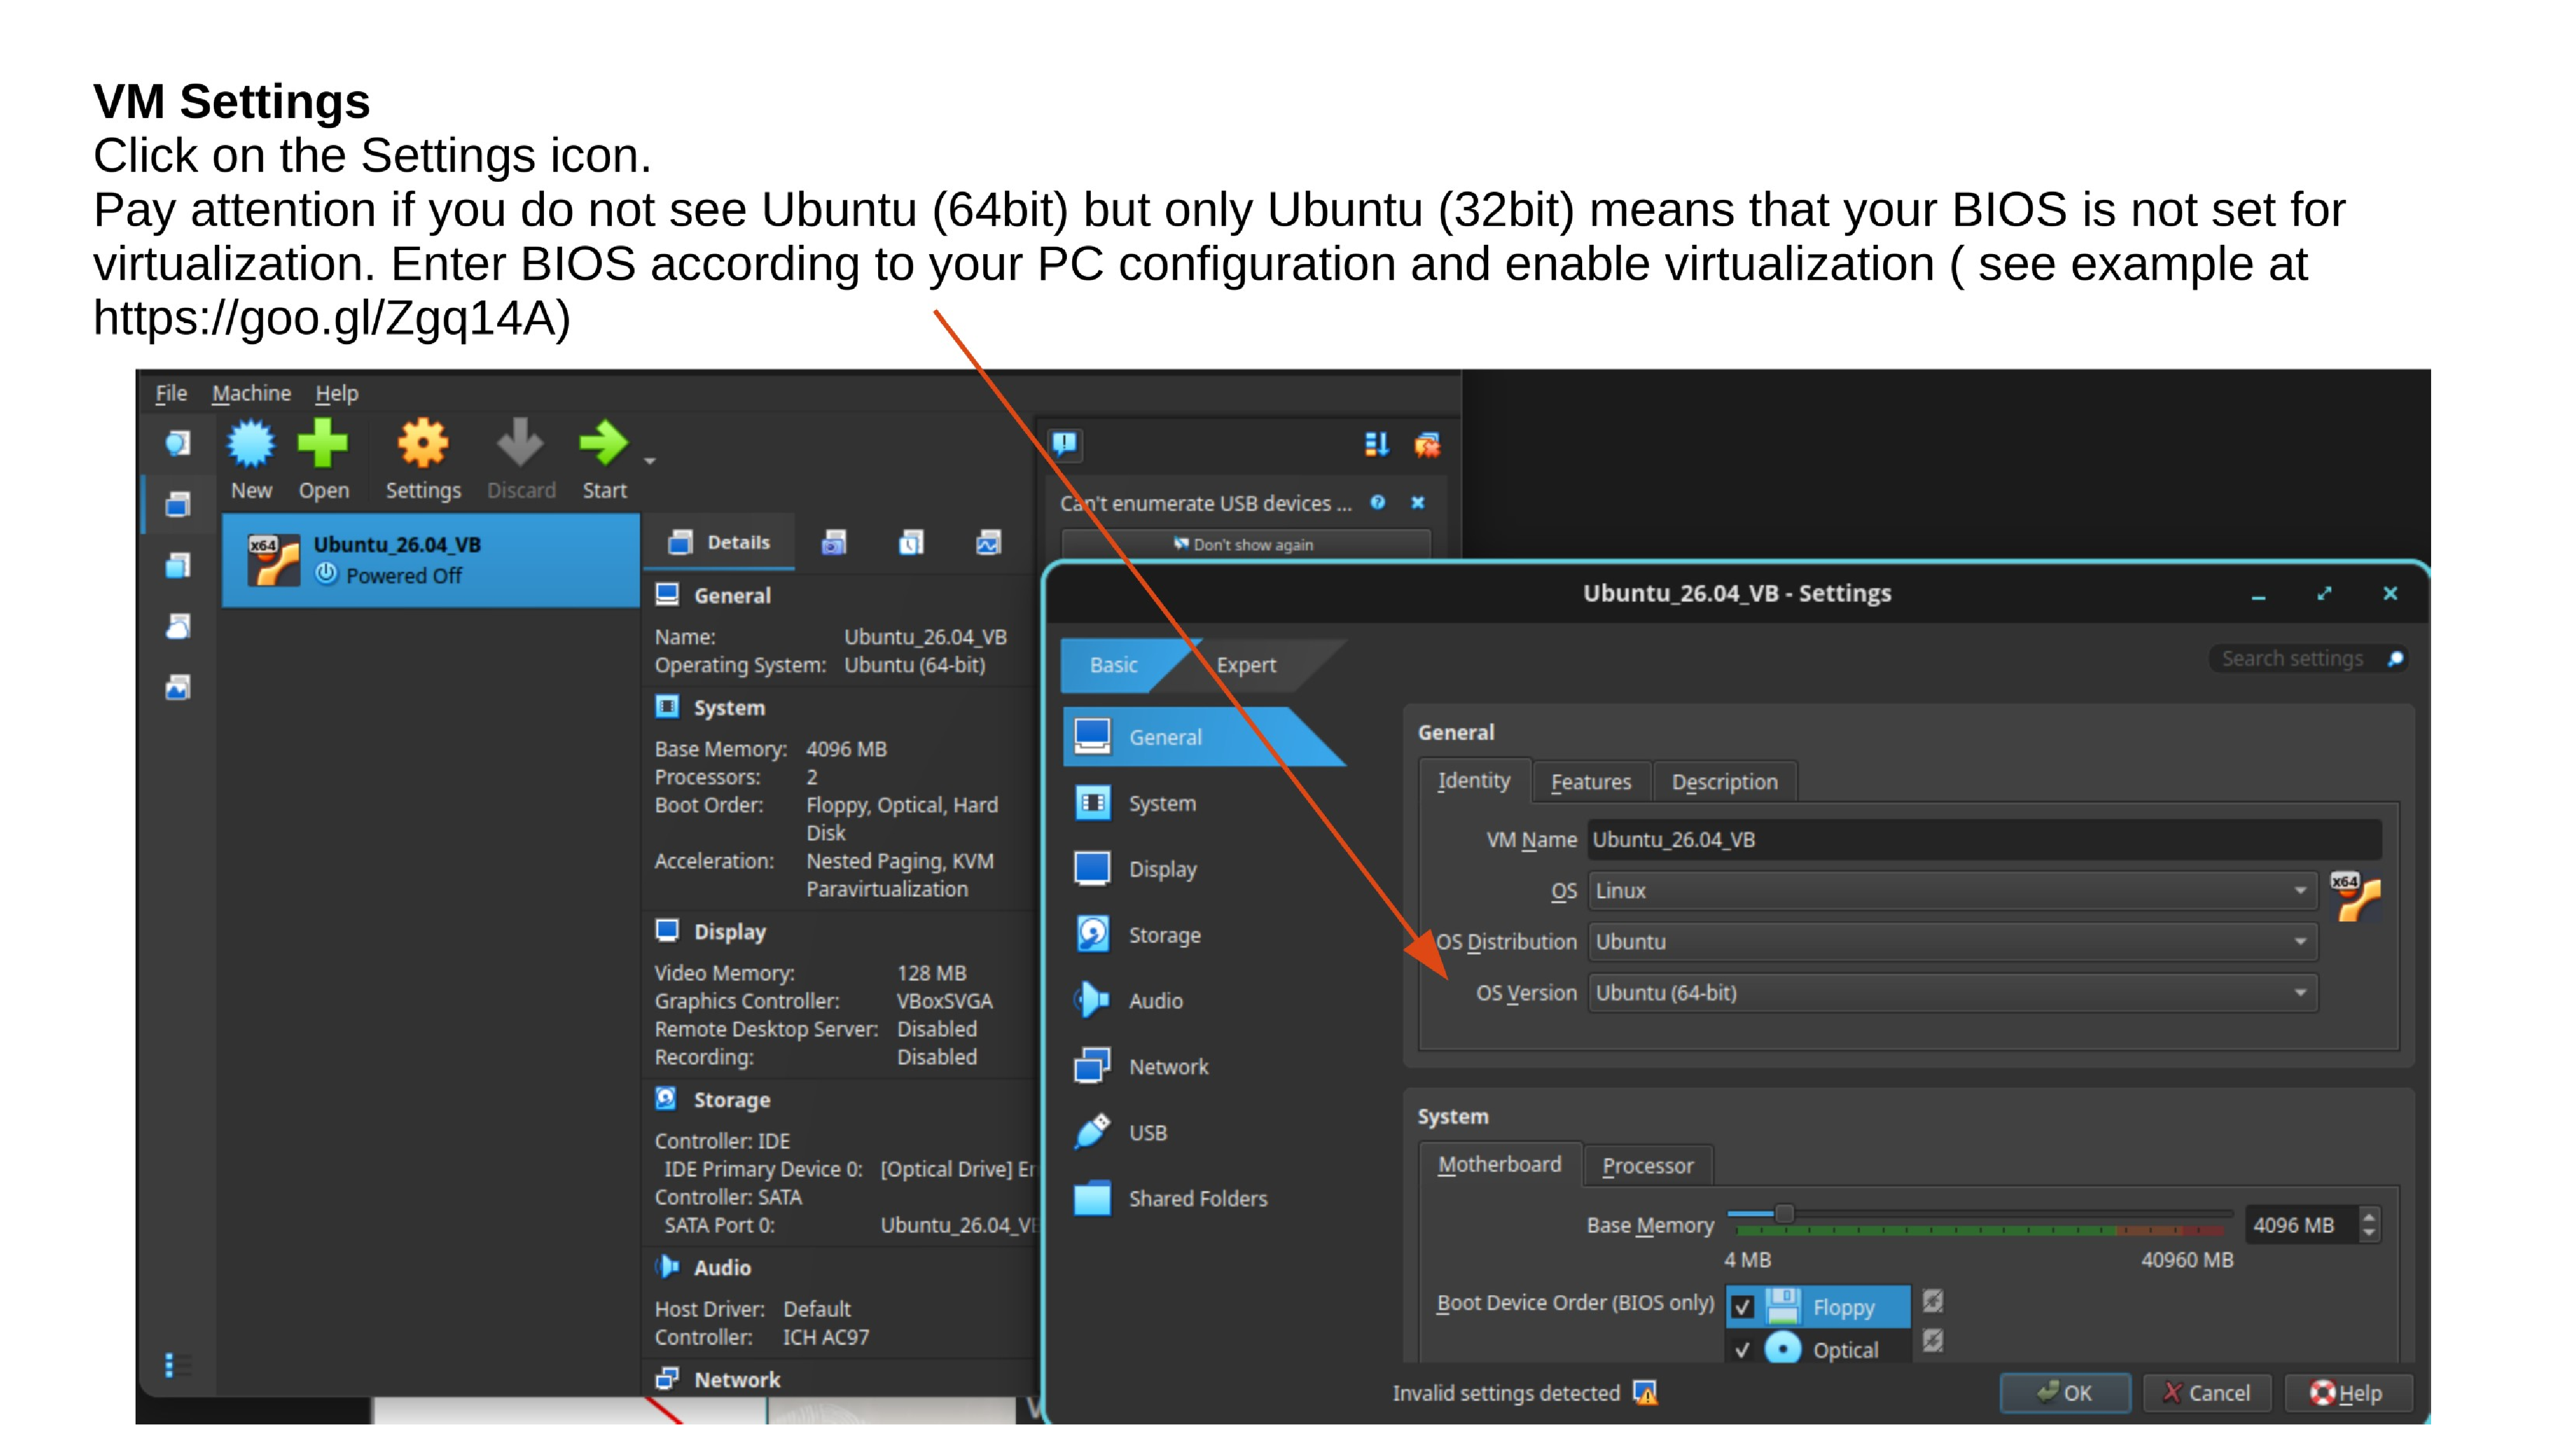
Lunch Virtualbox from OS and follow the below instructions.
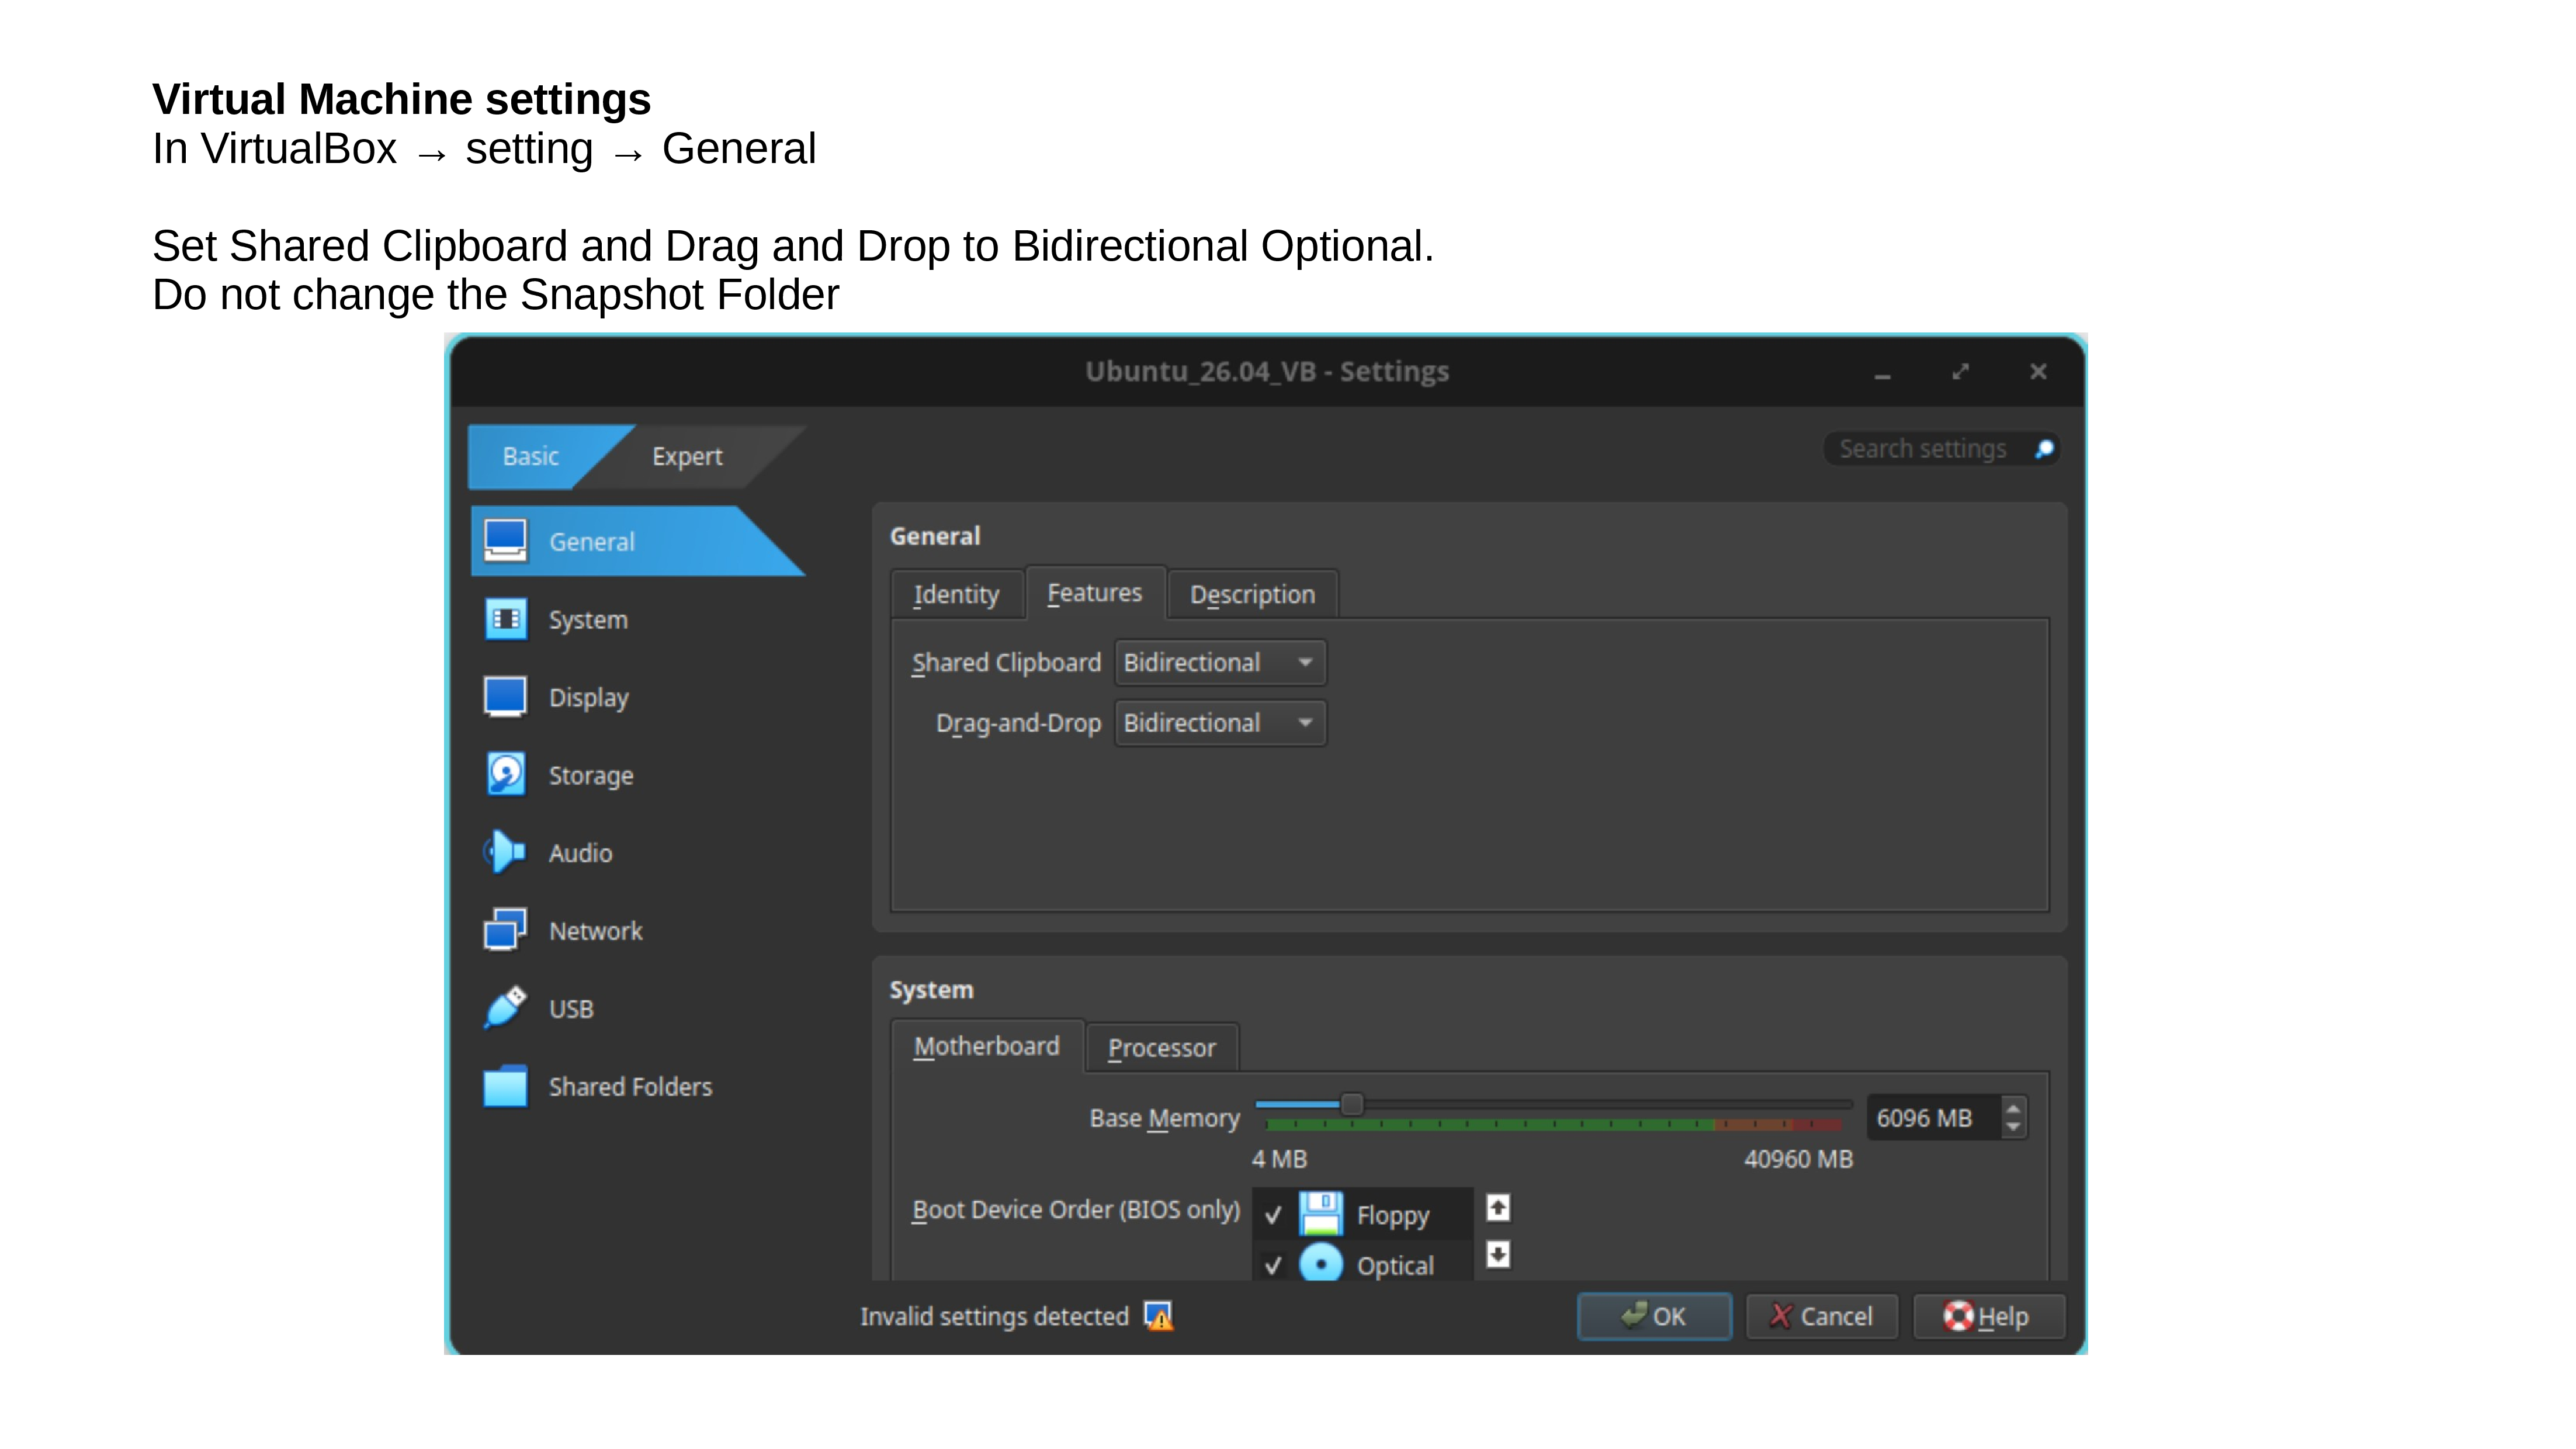
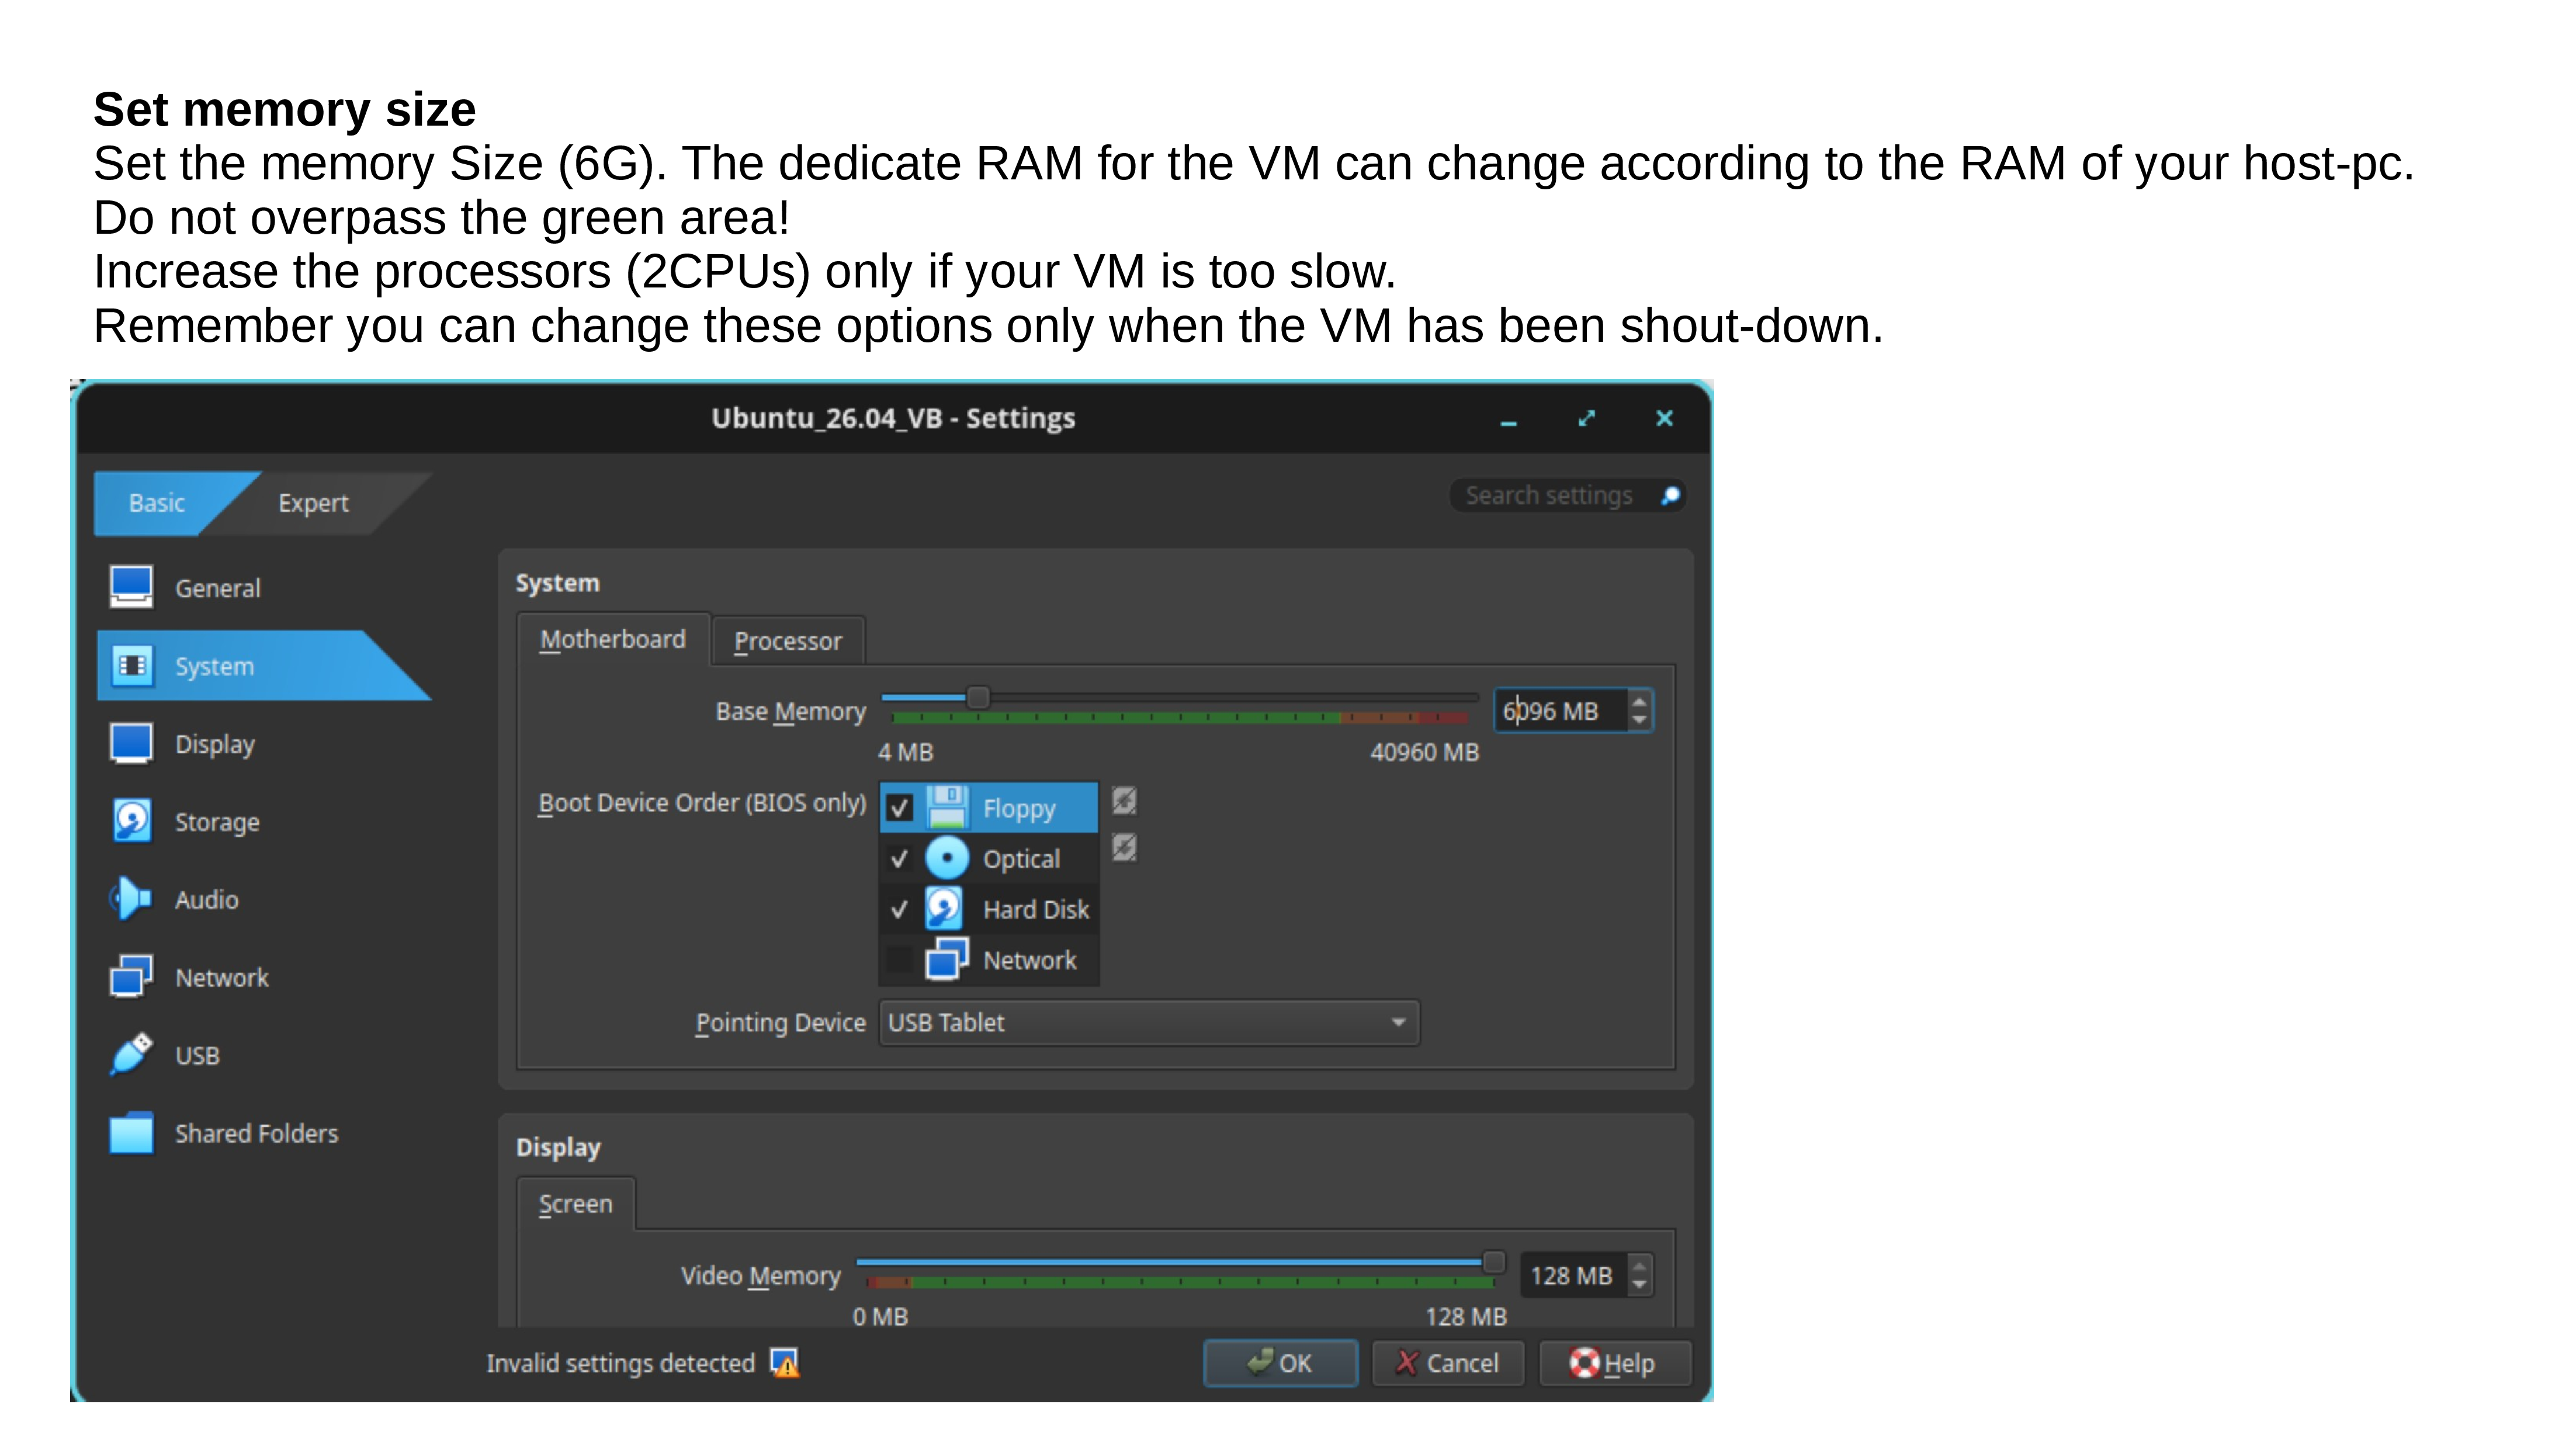
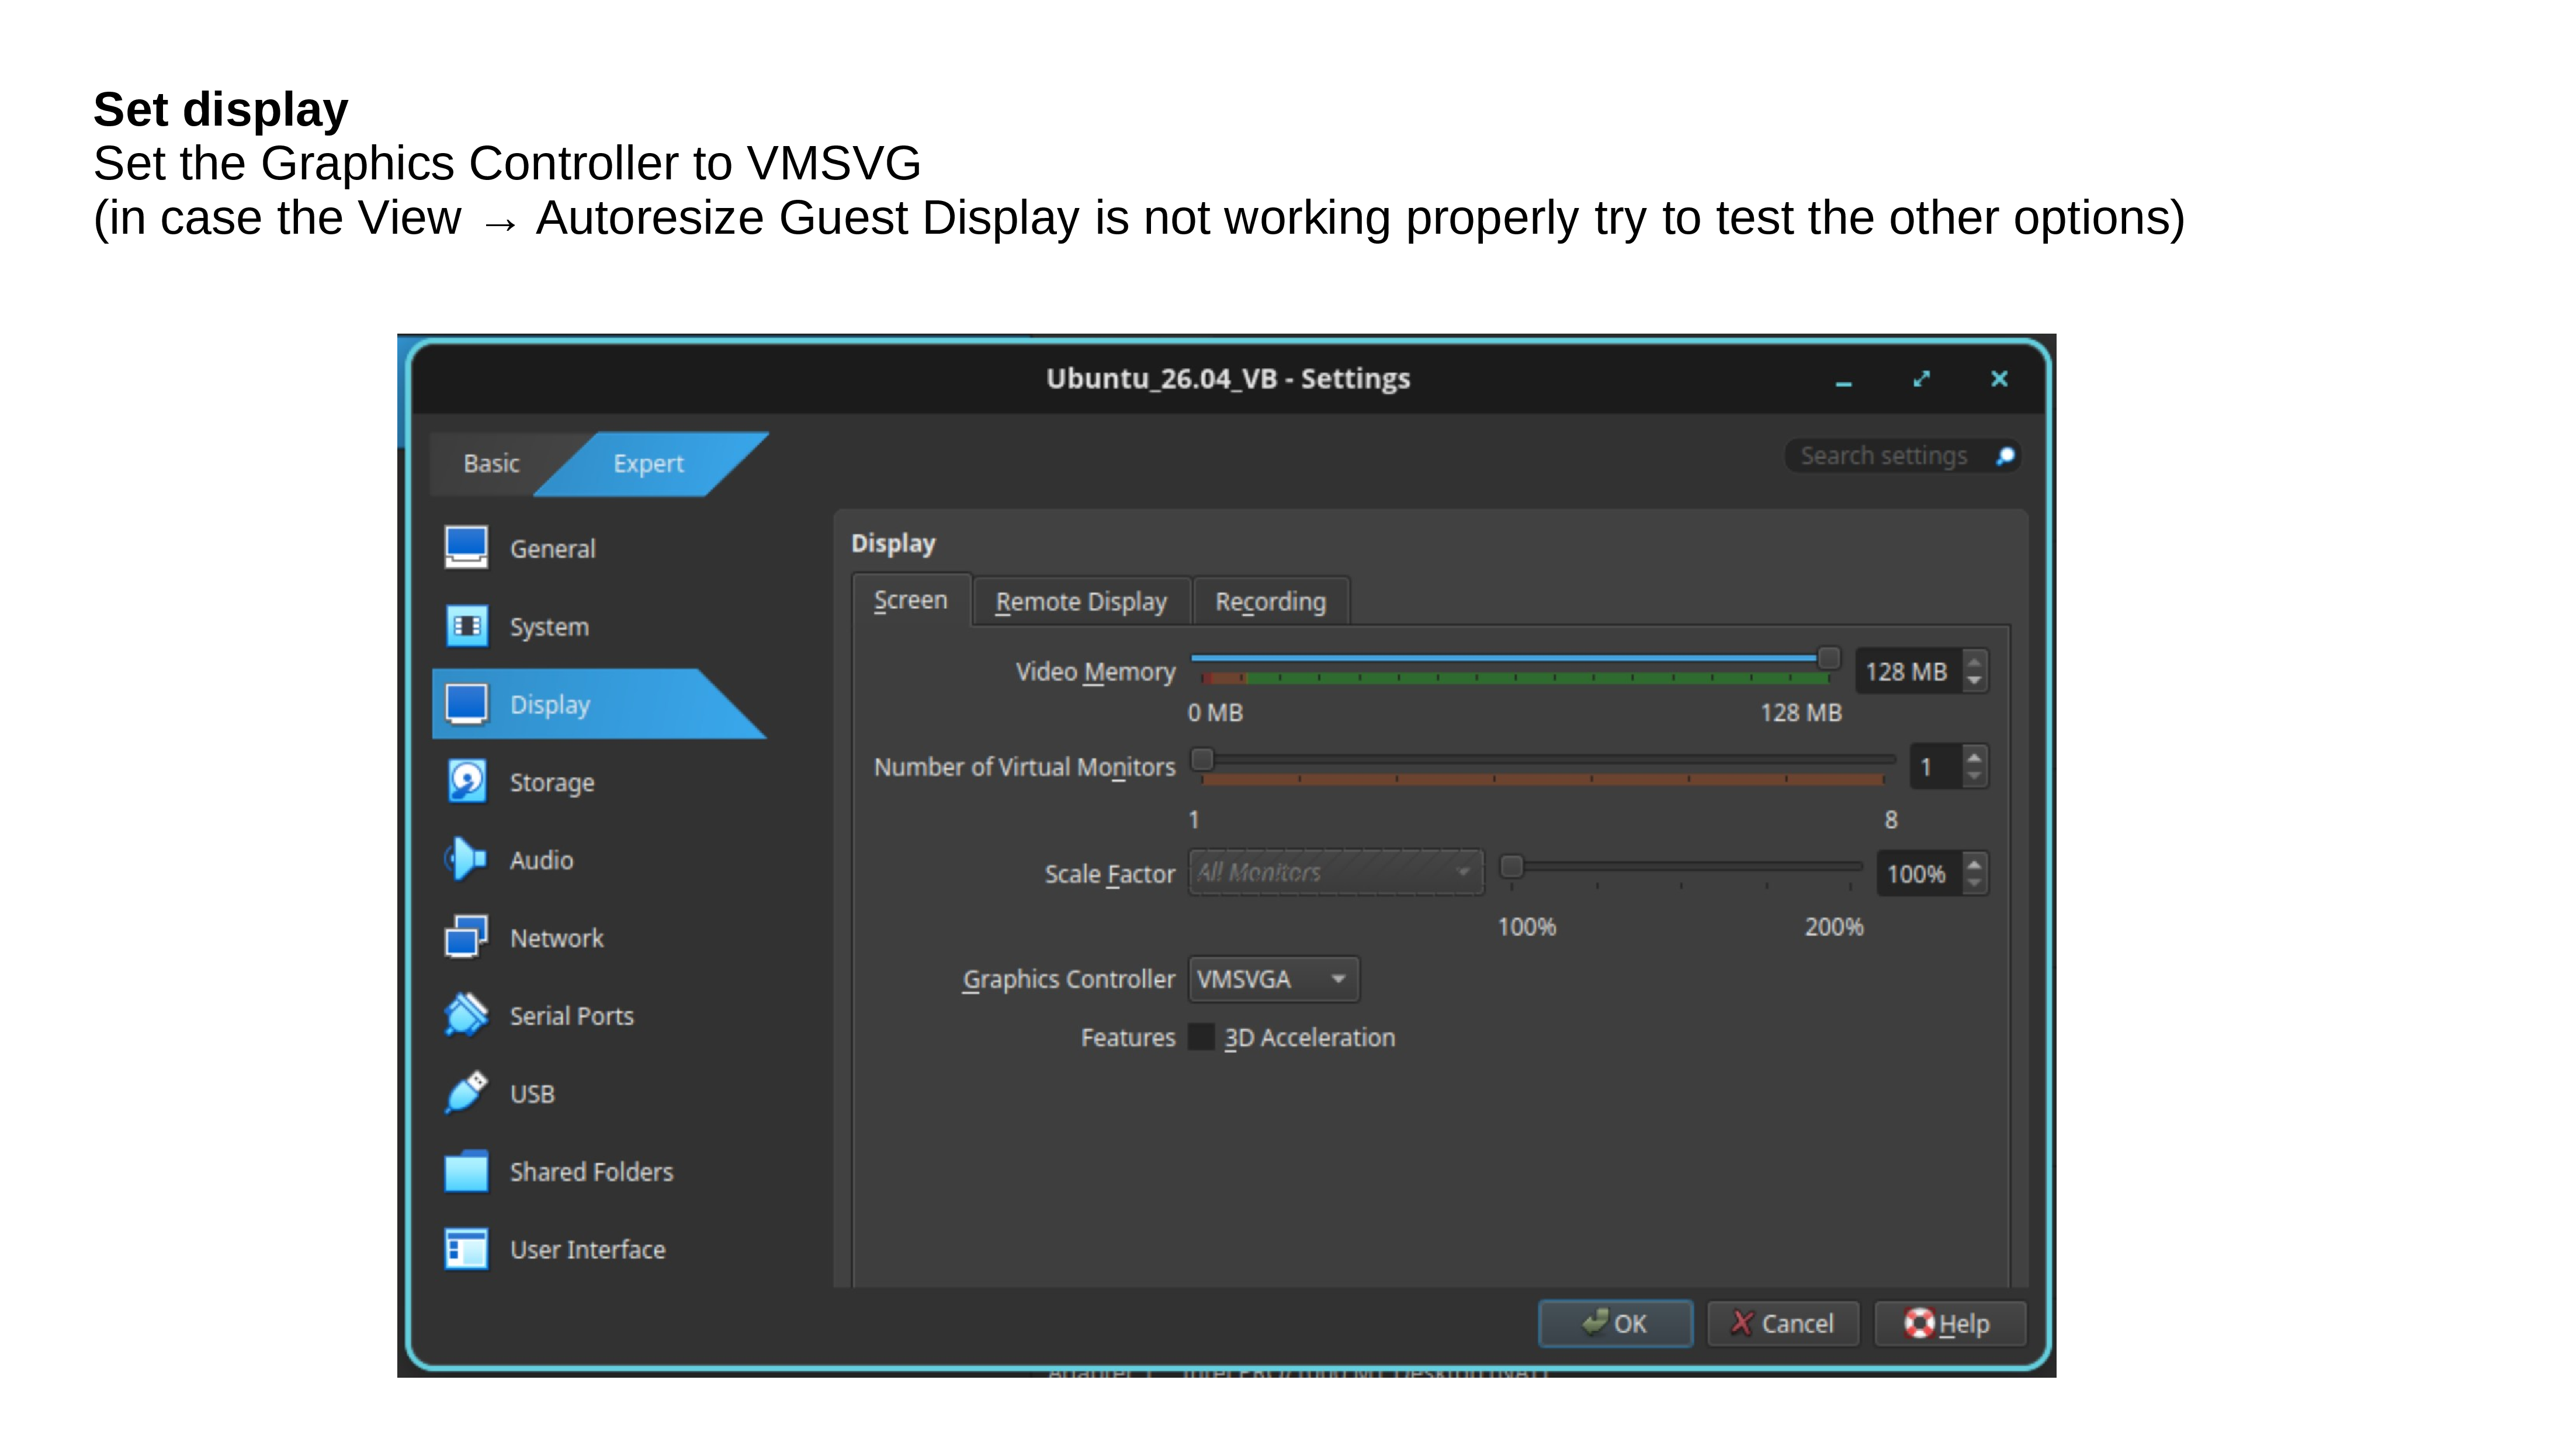
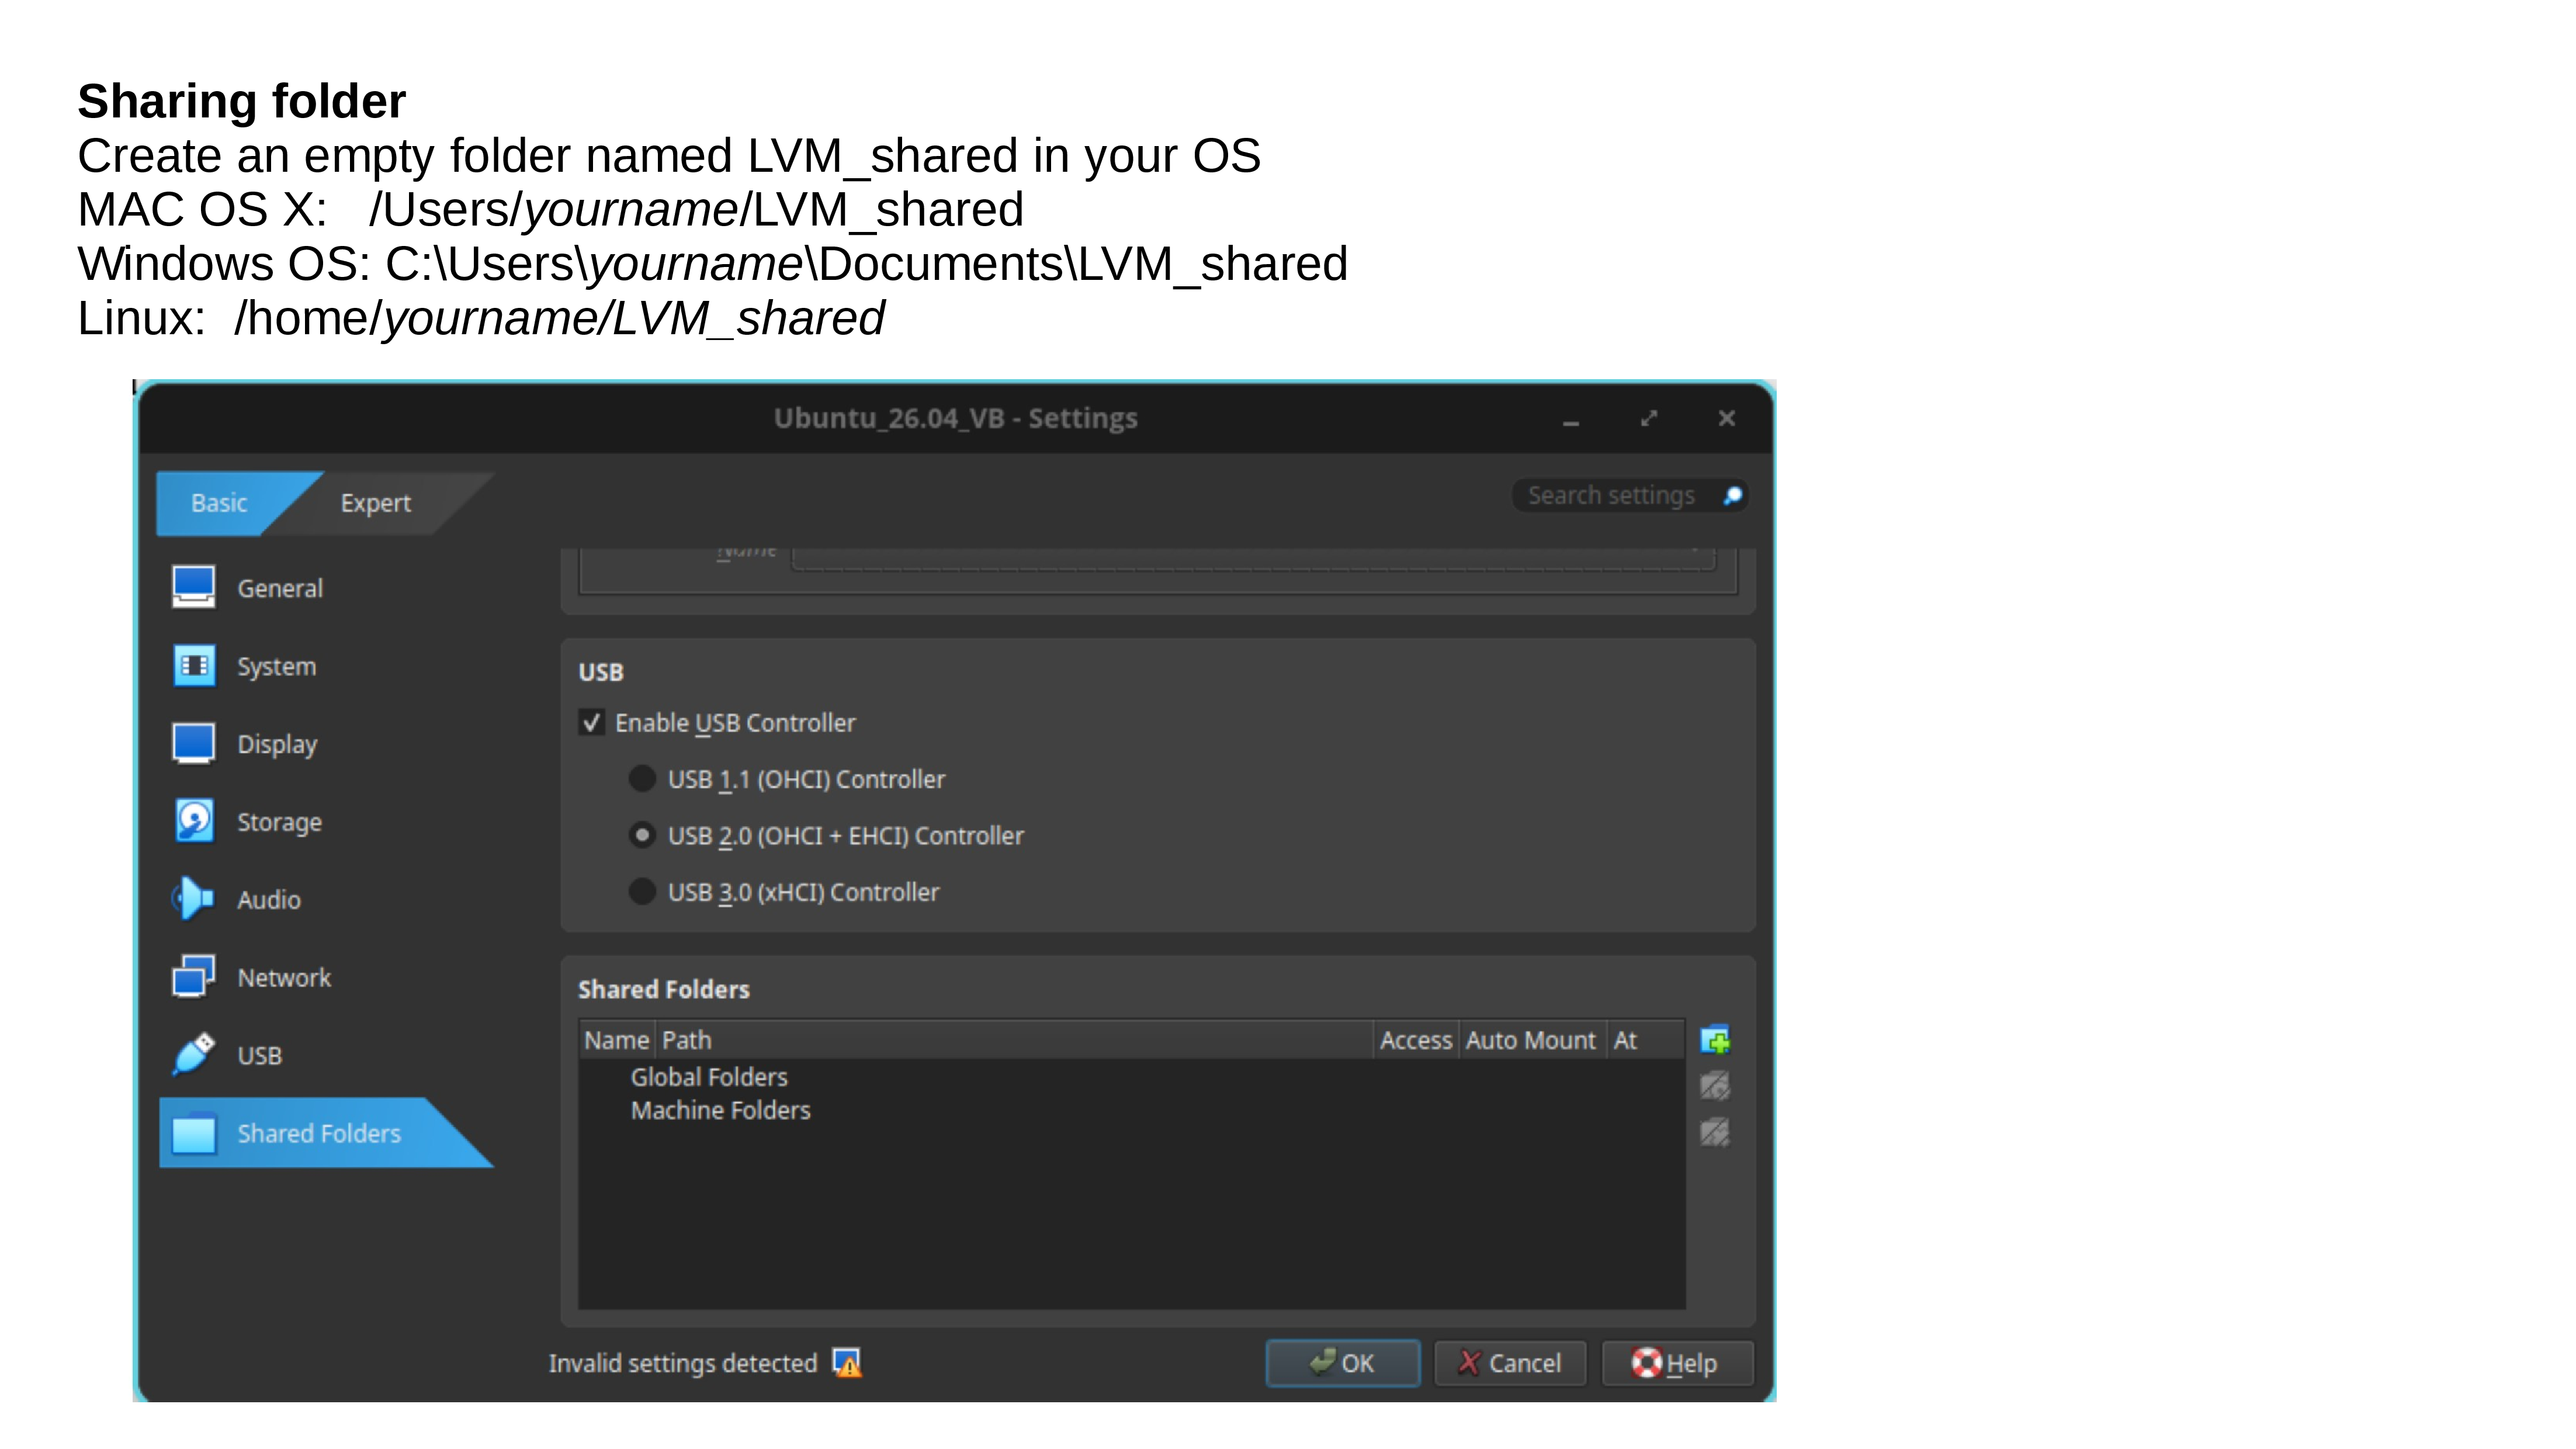
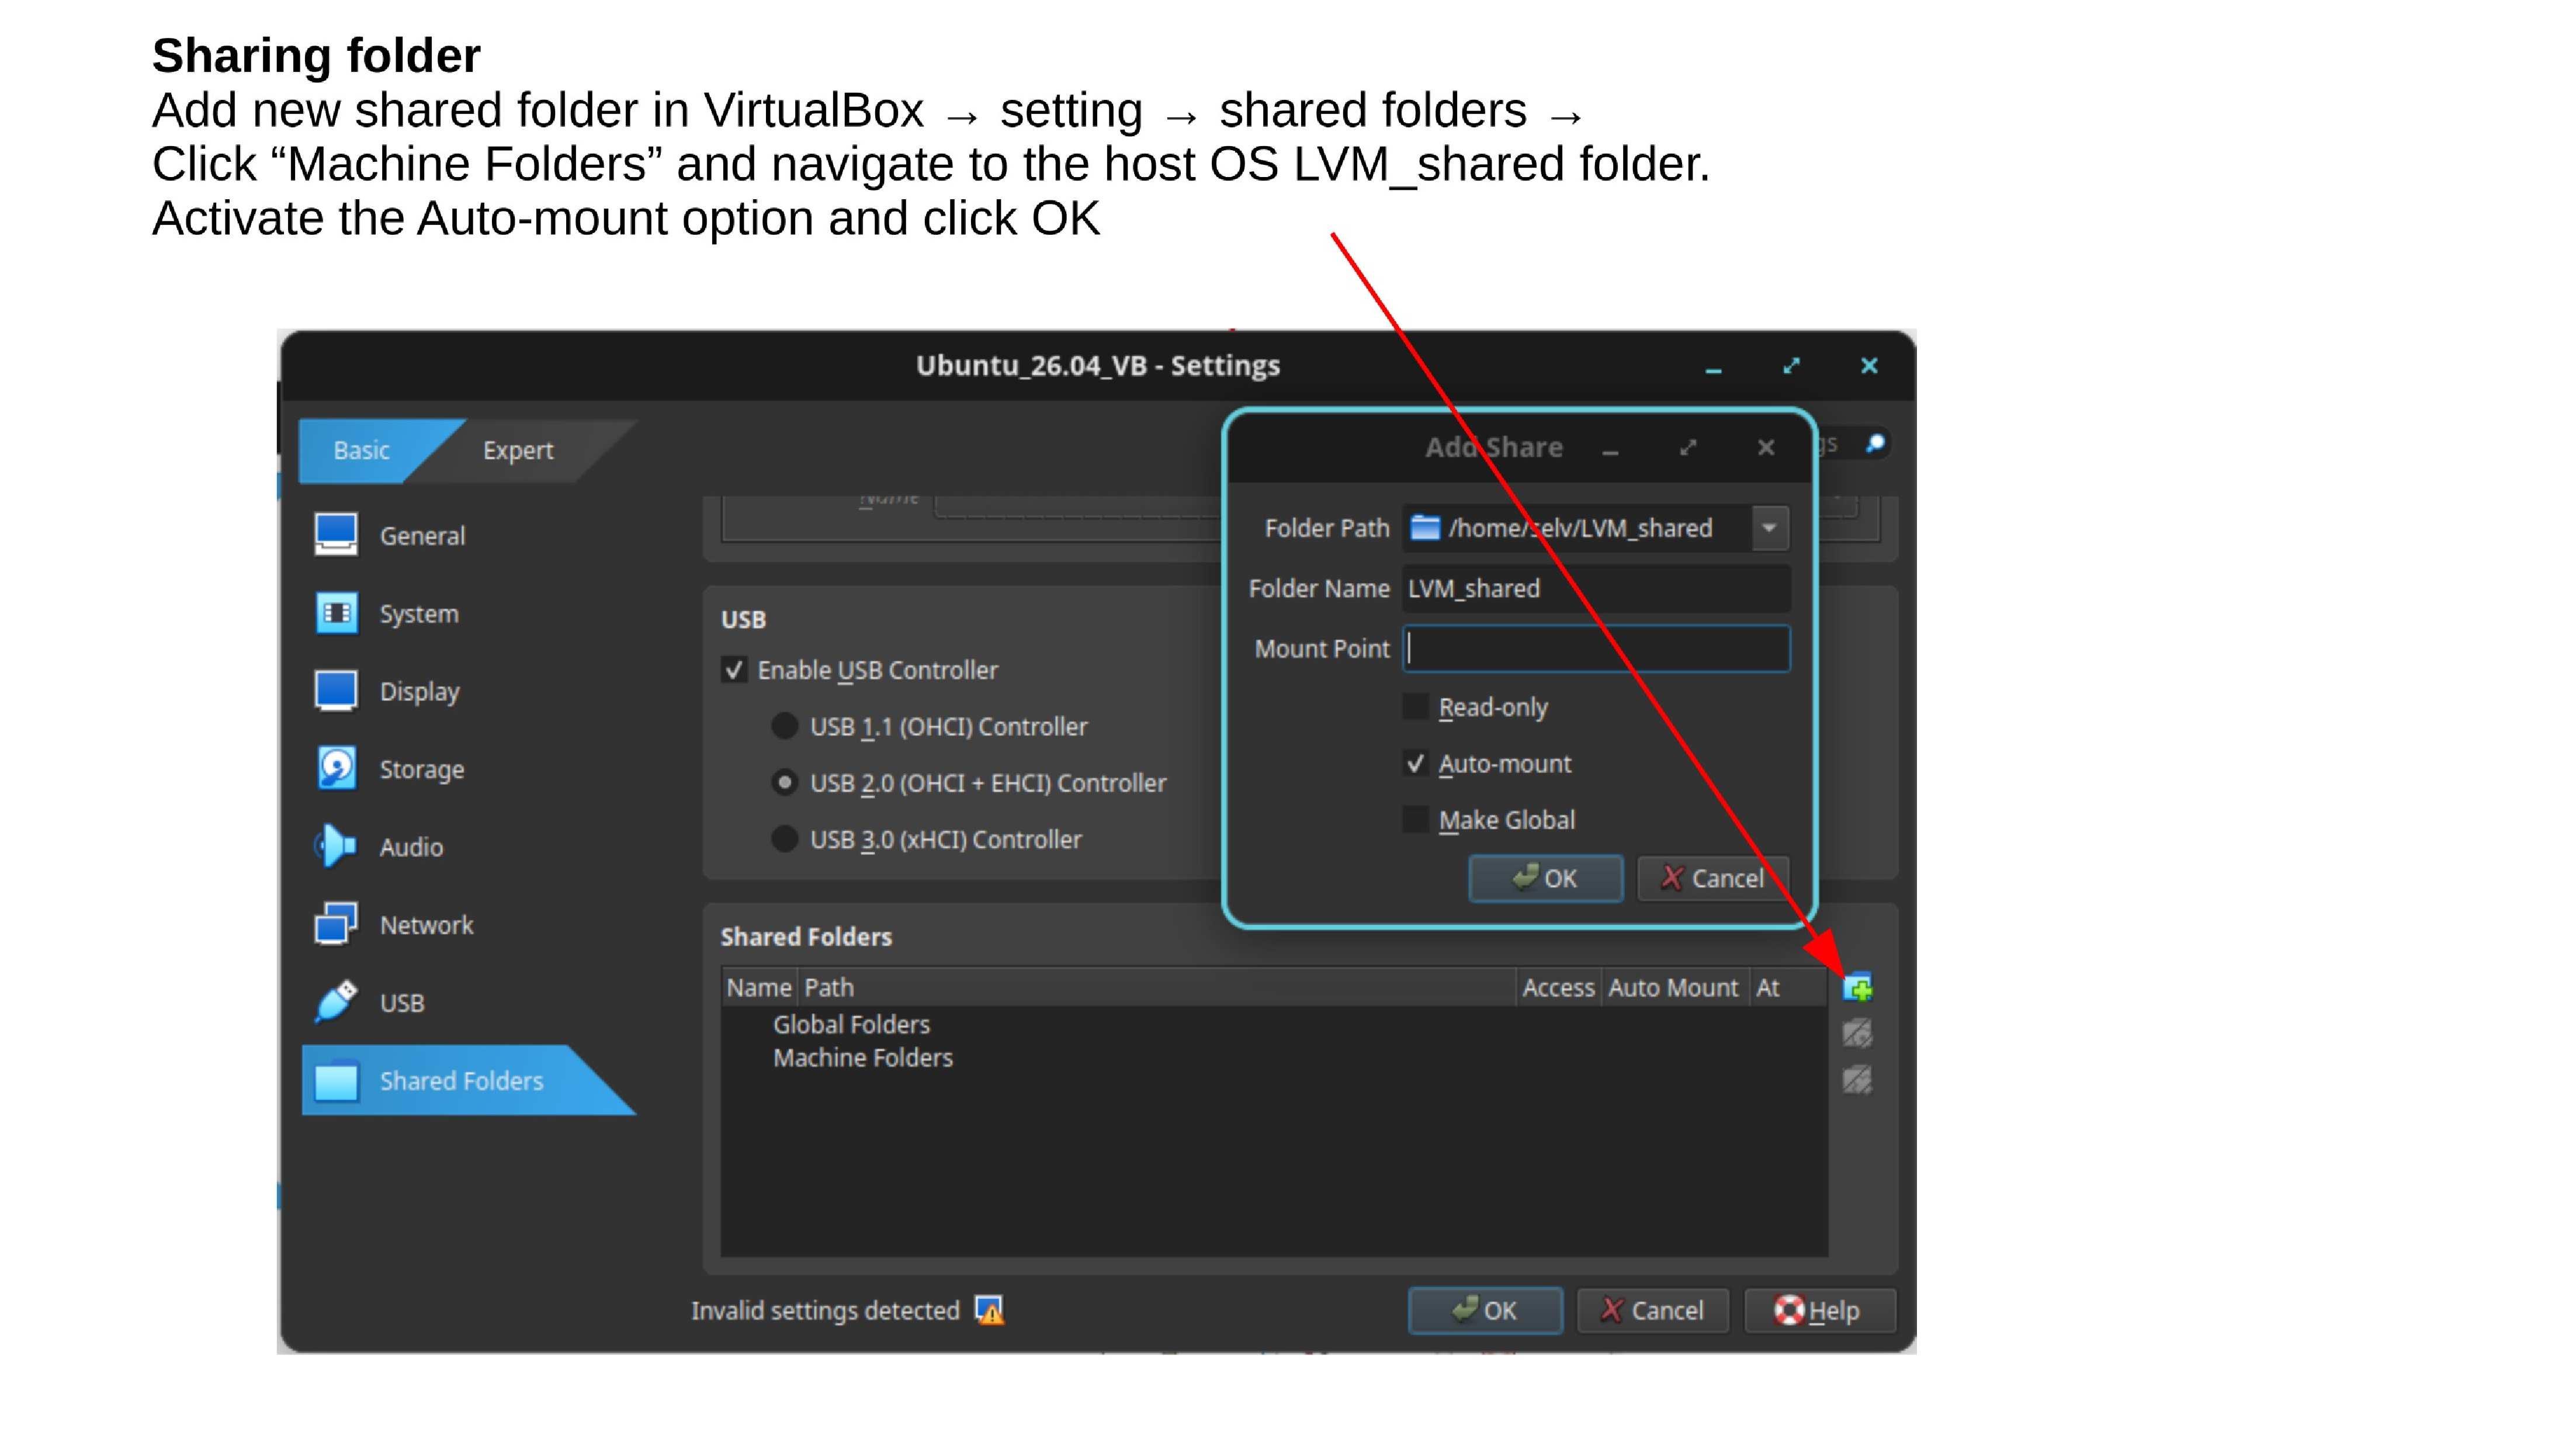
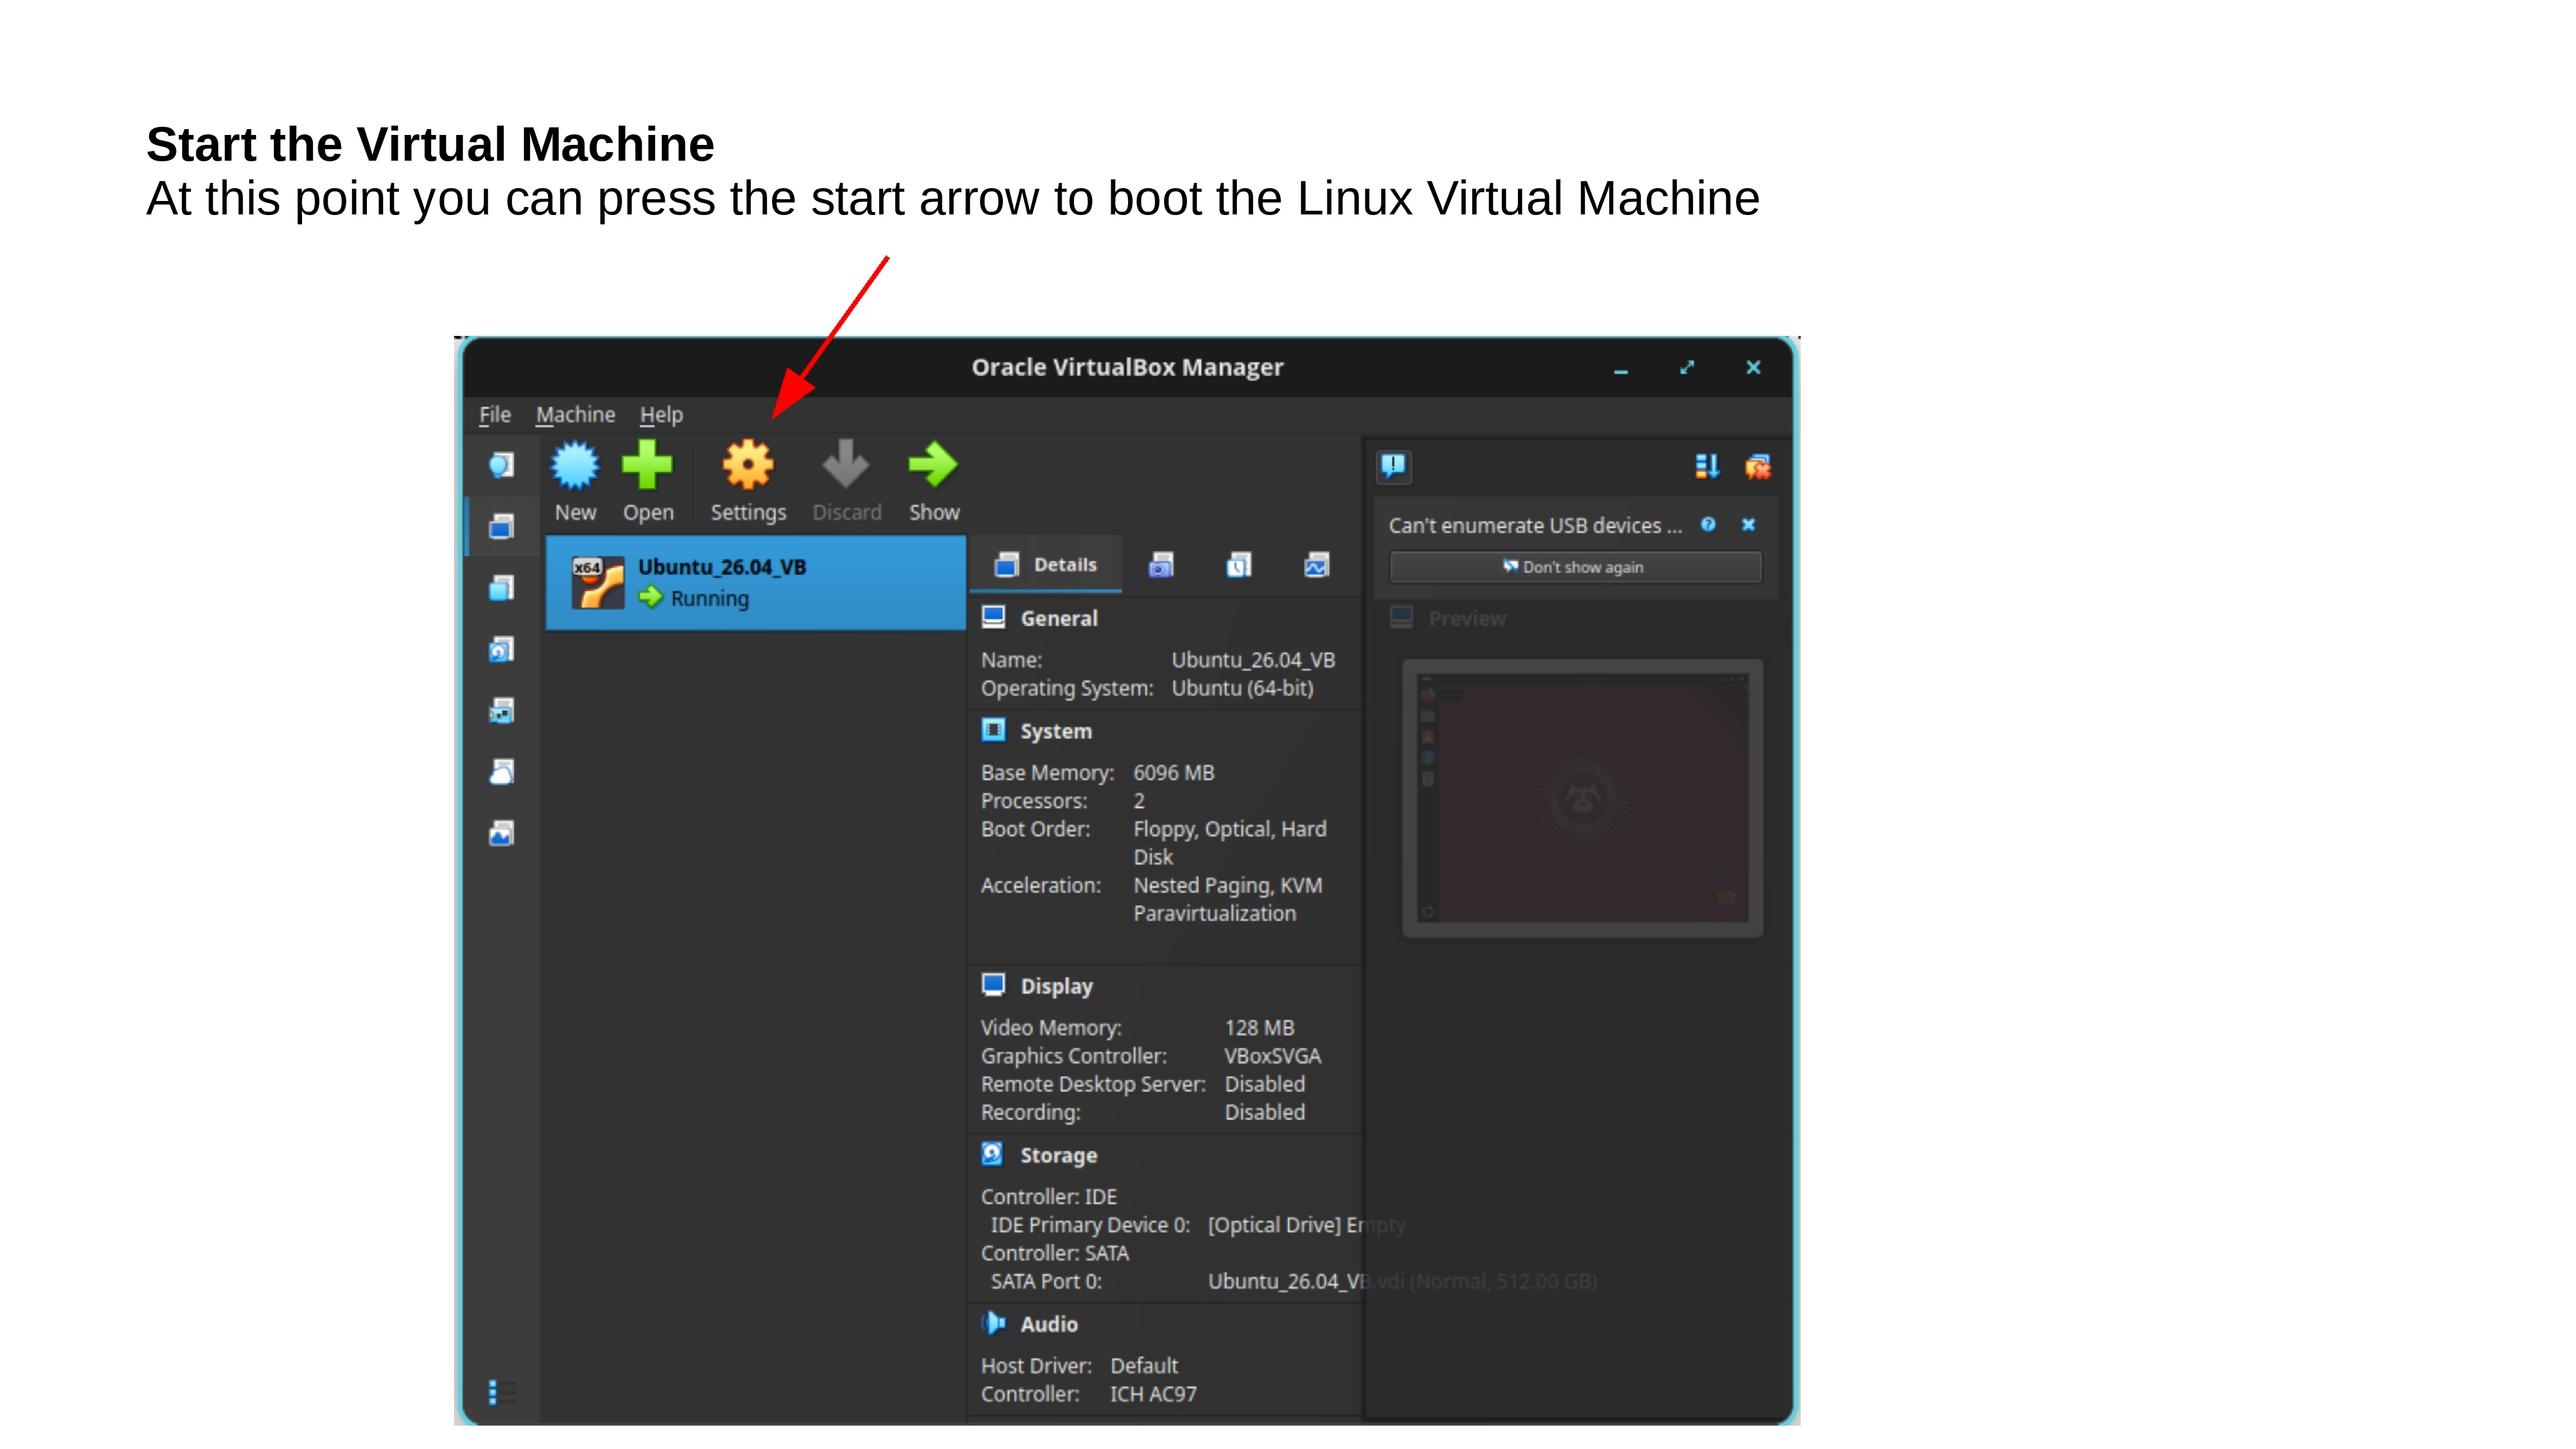
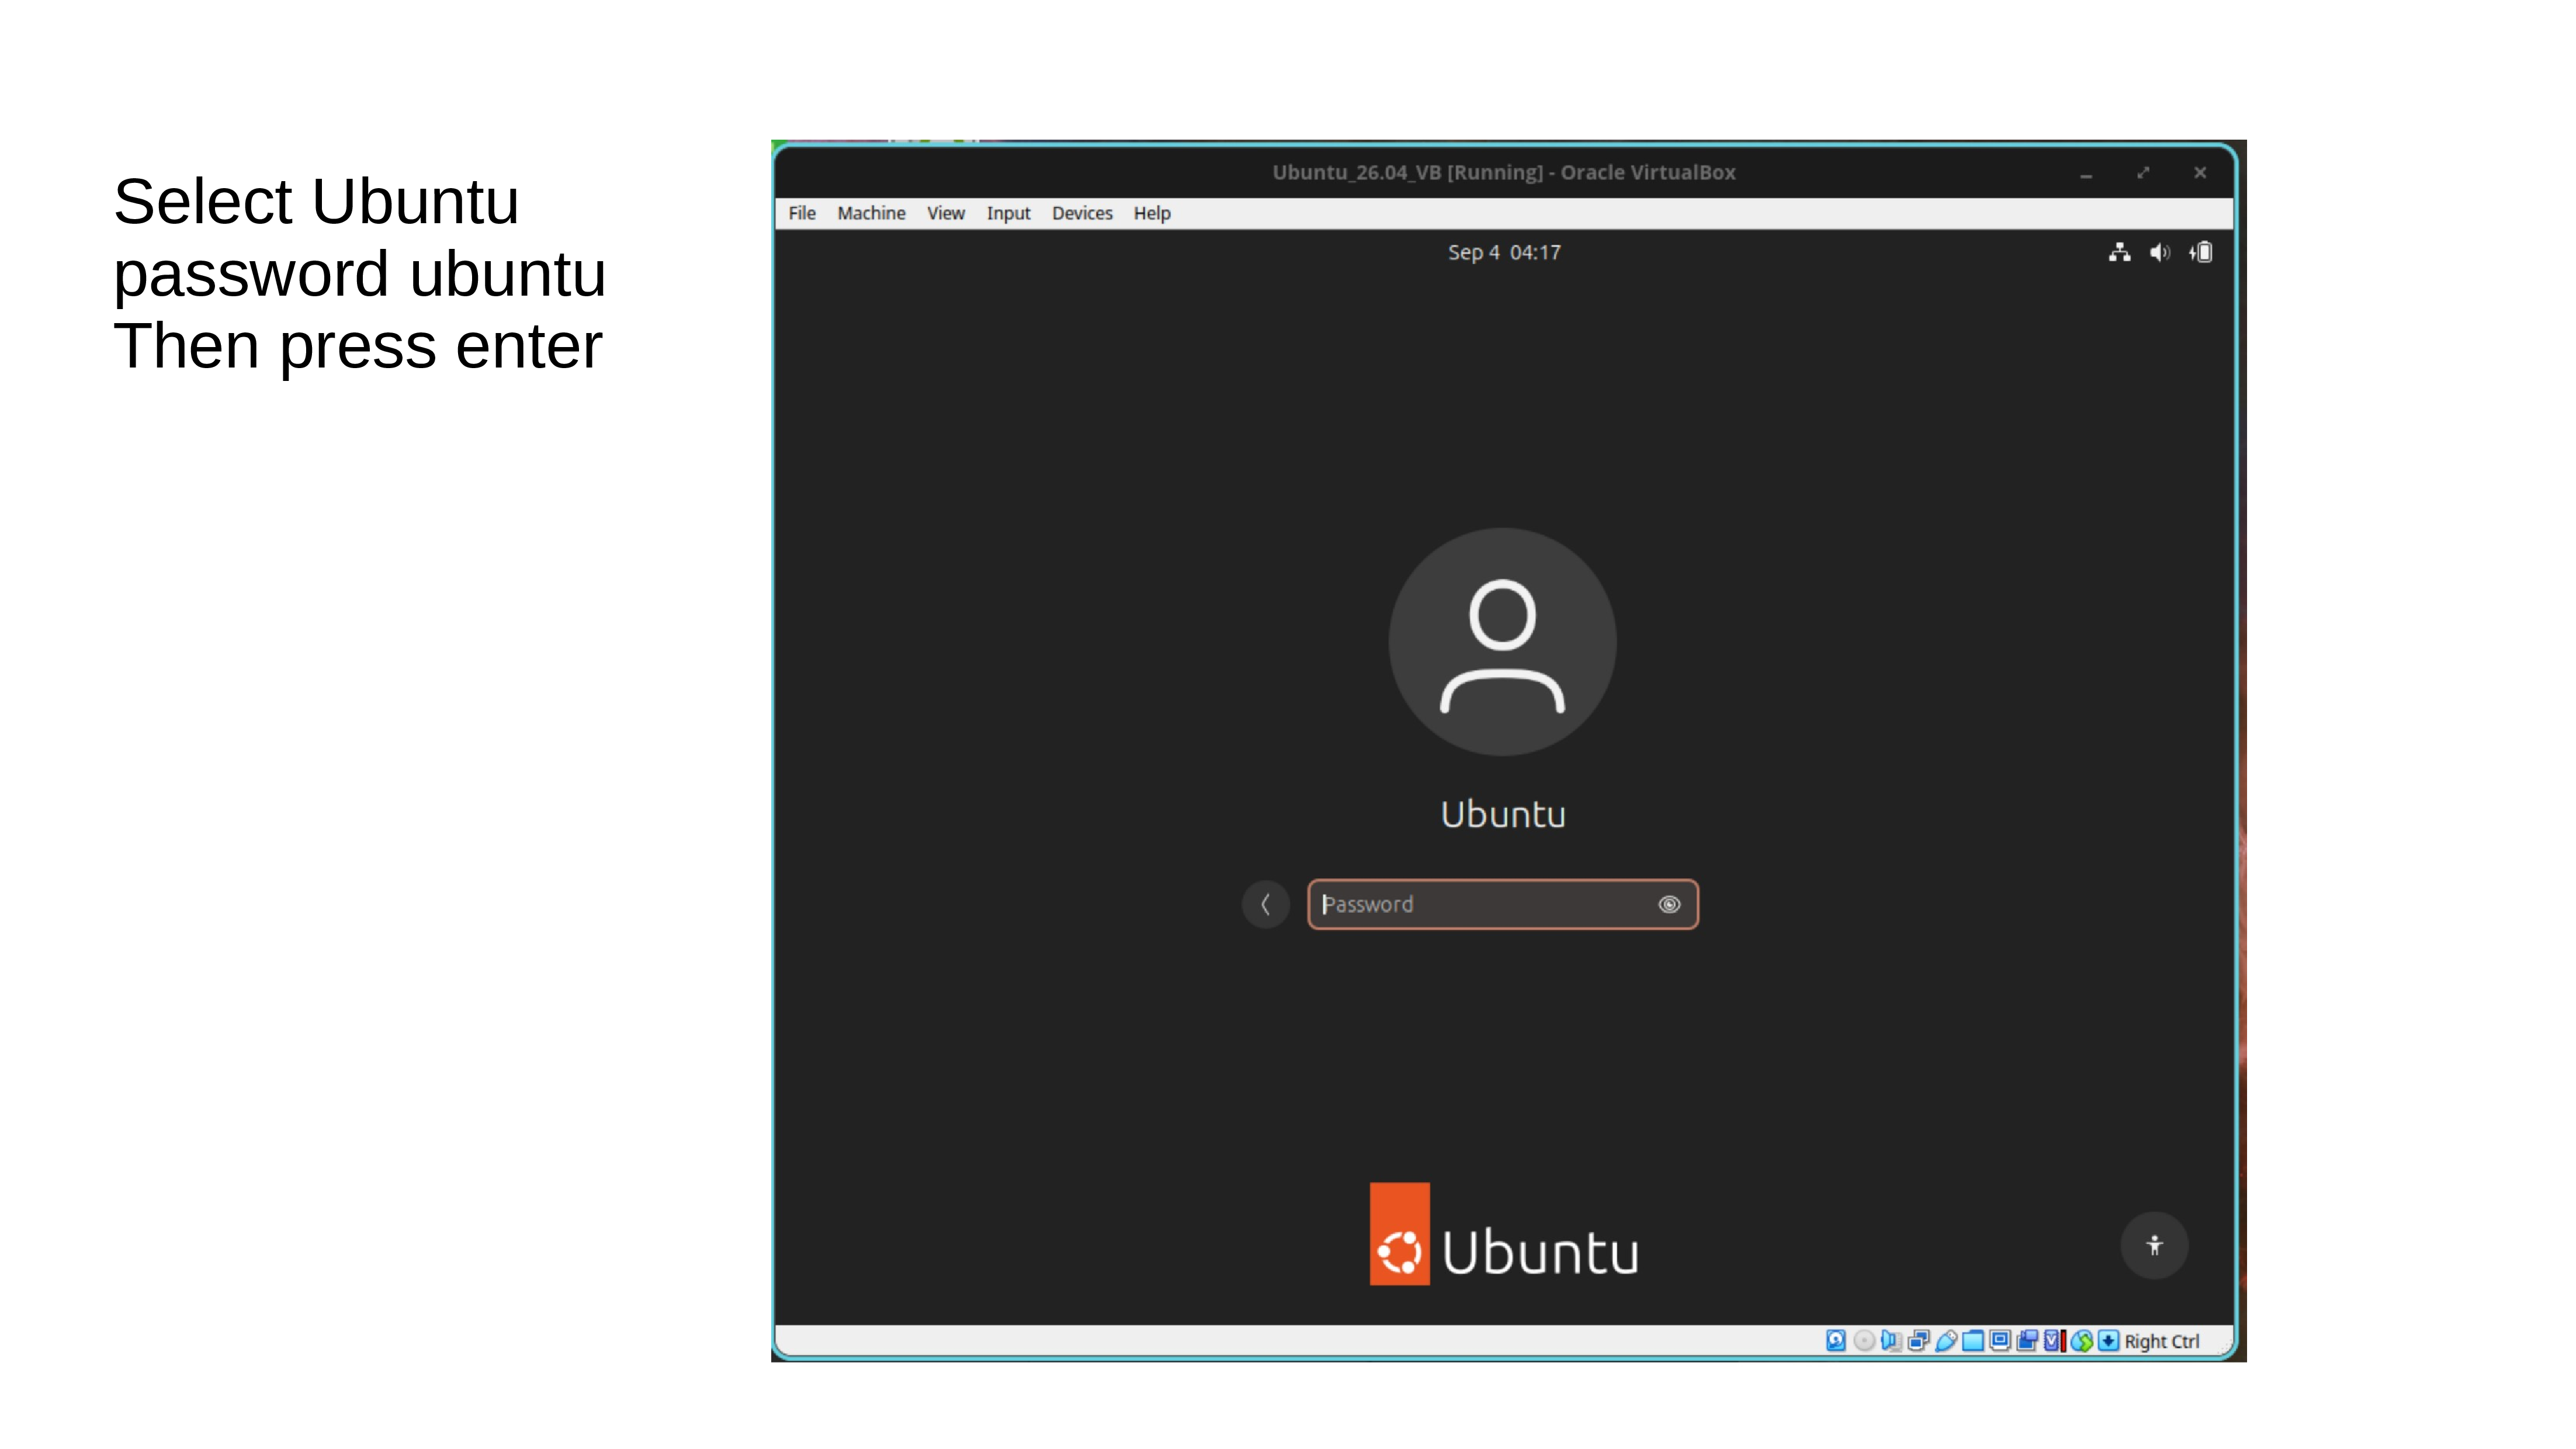
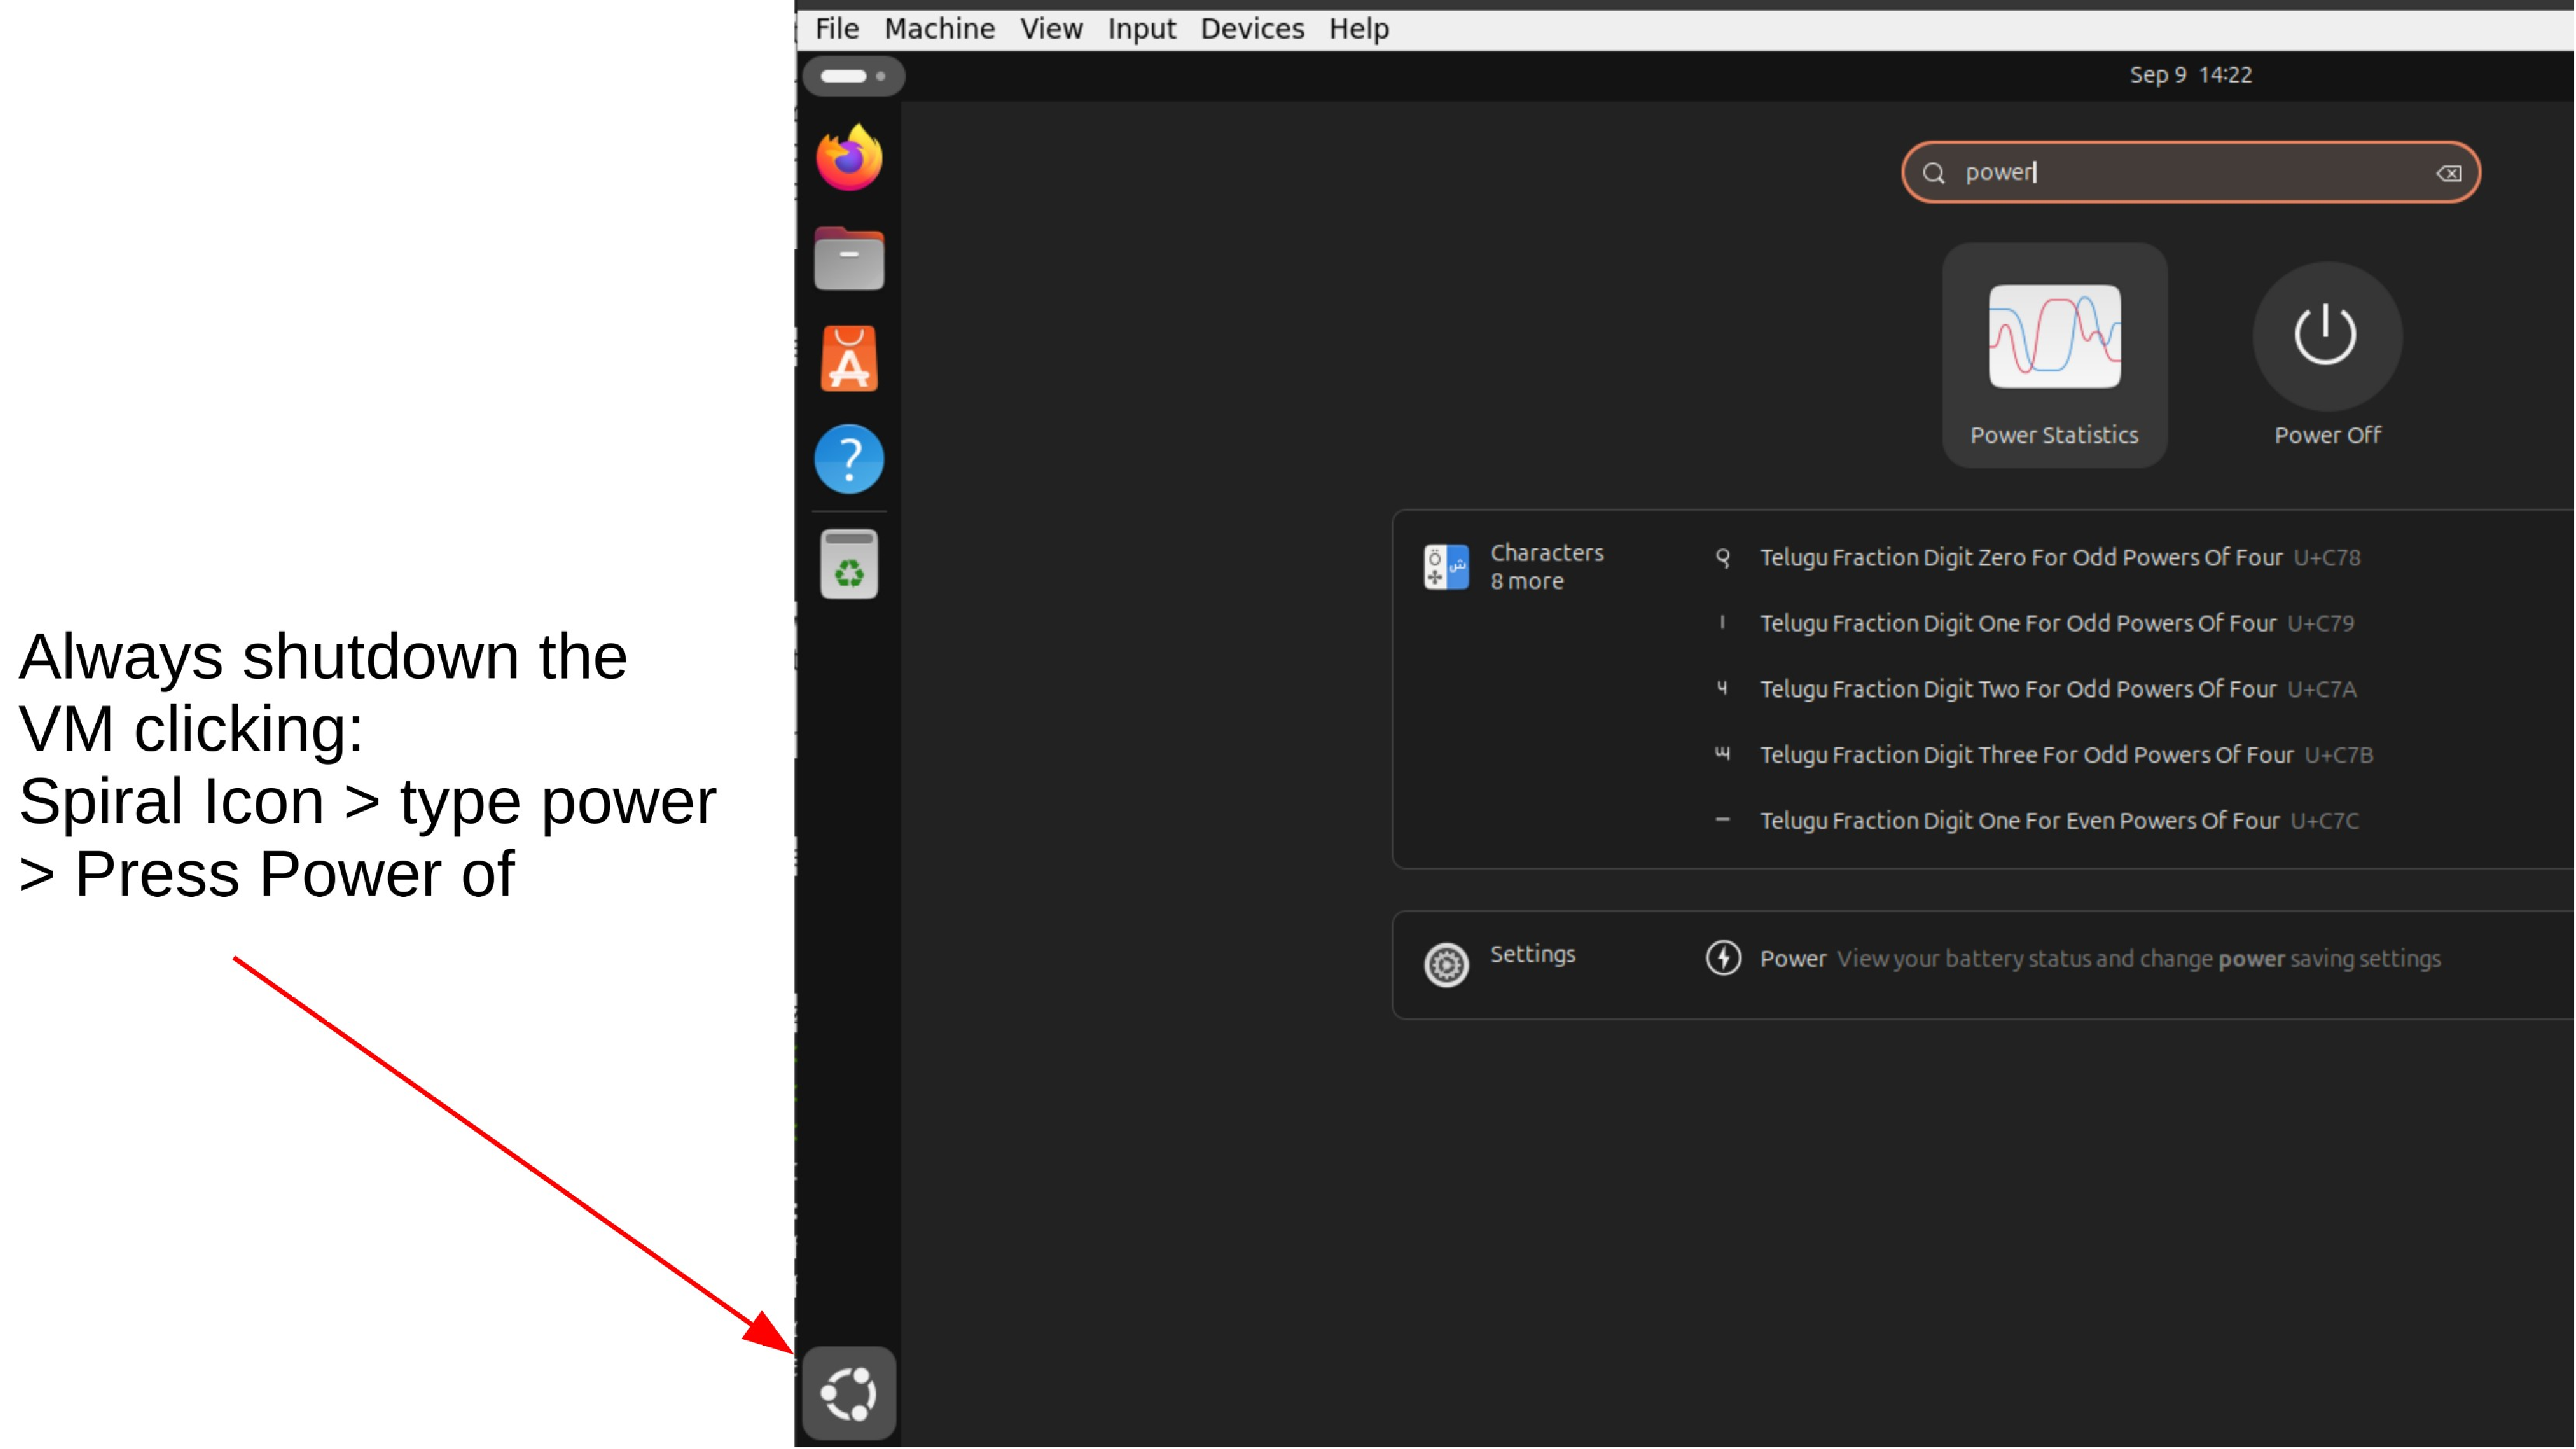
Test your Ubuntu 26.04 LTS Virtual Machine
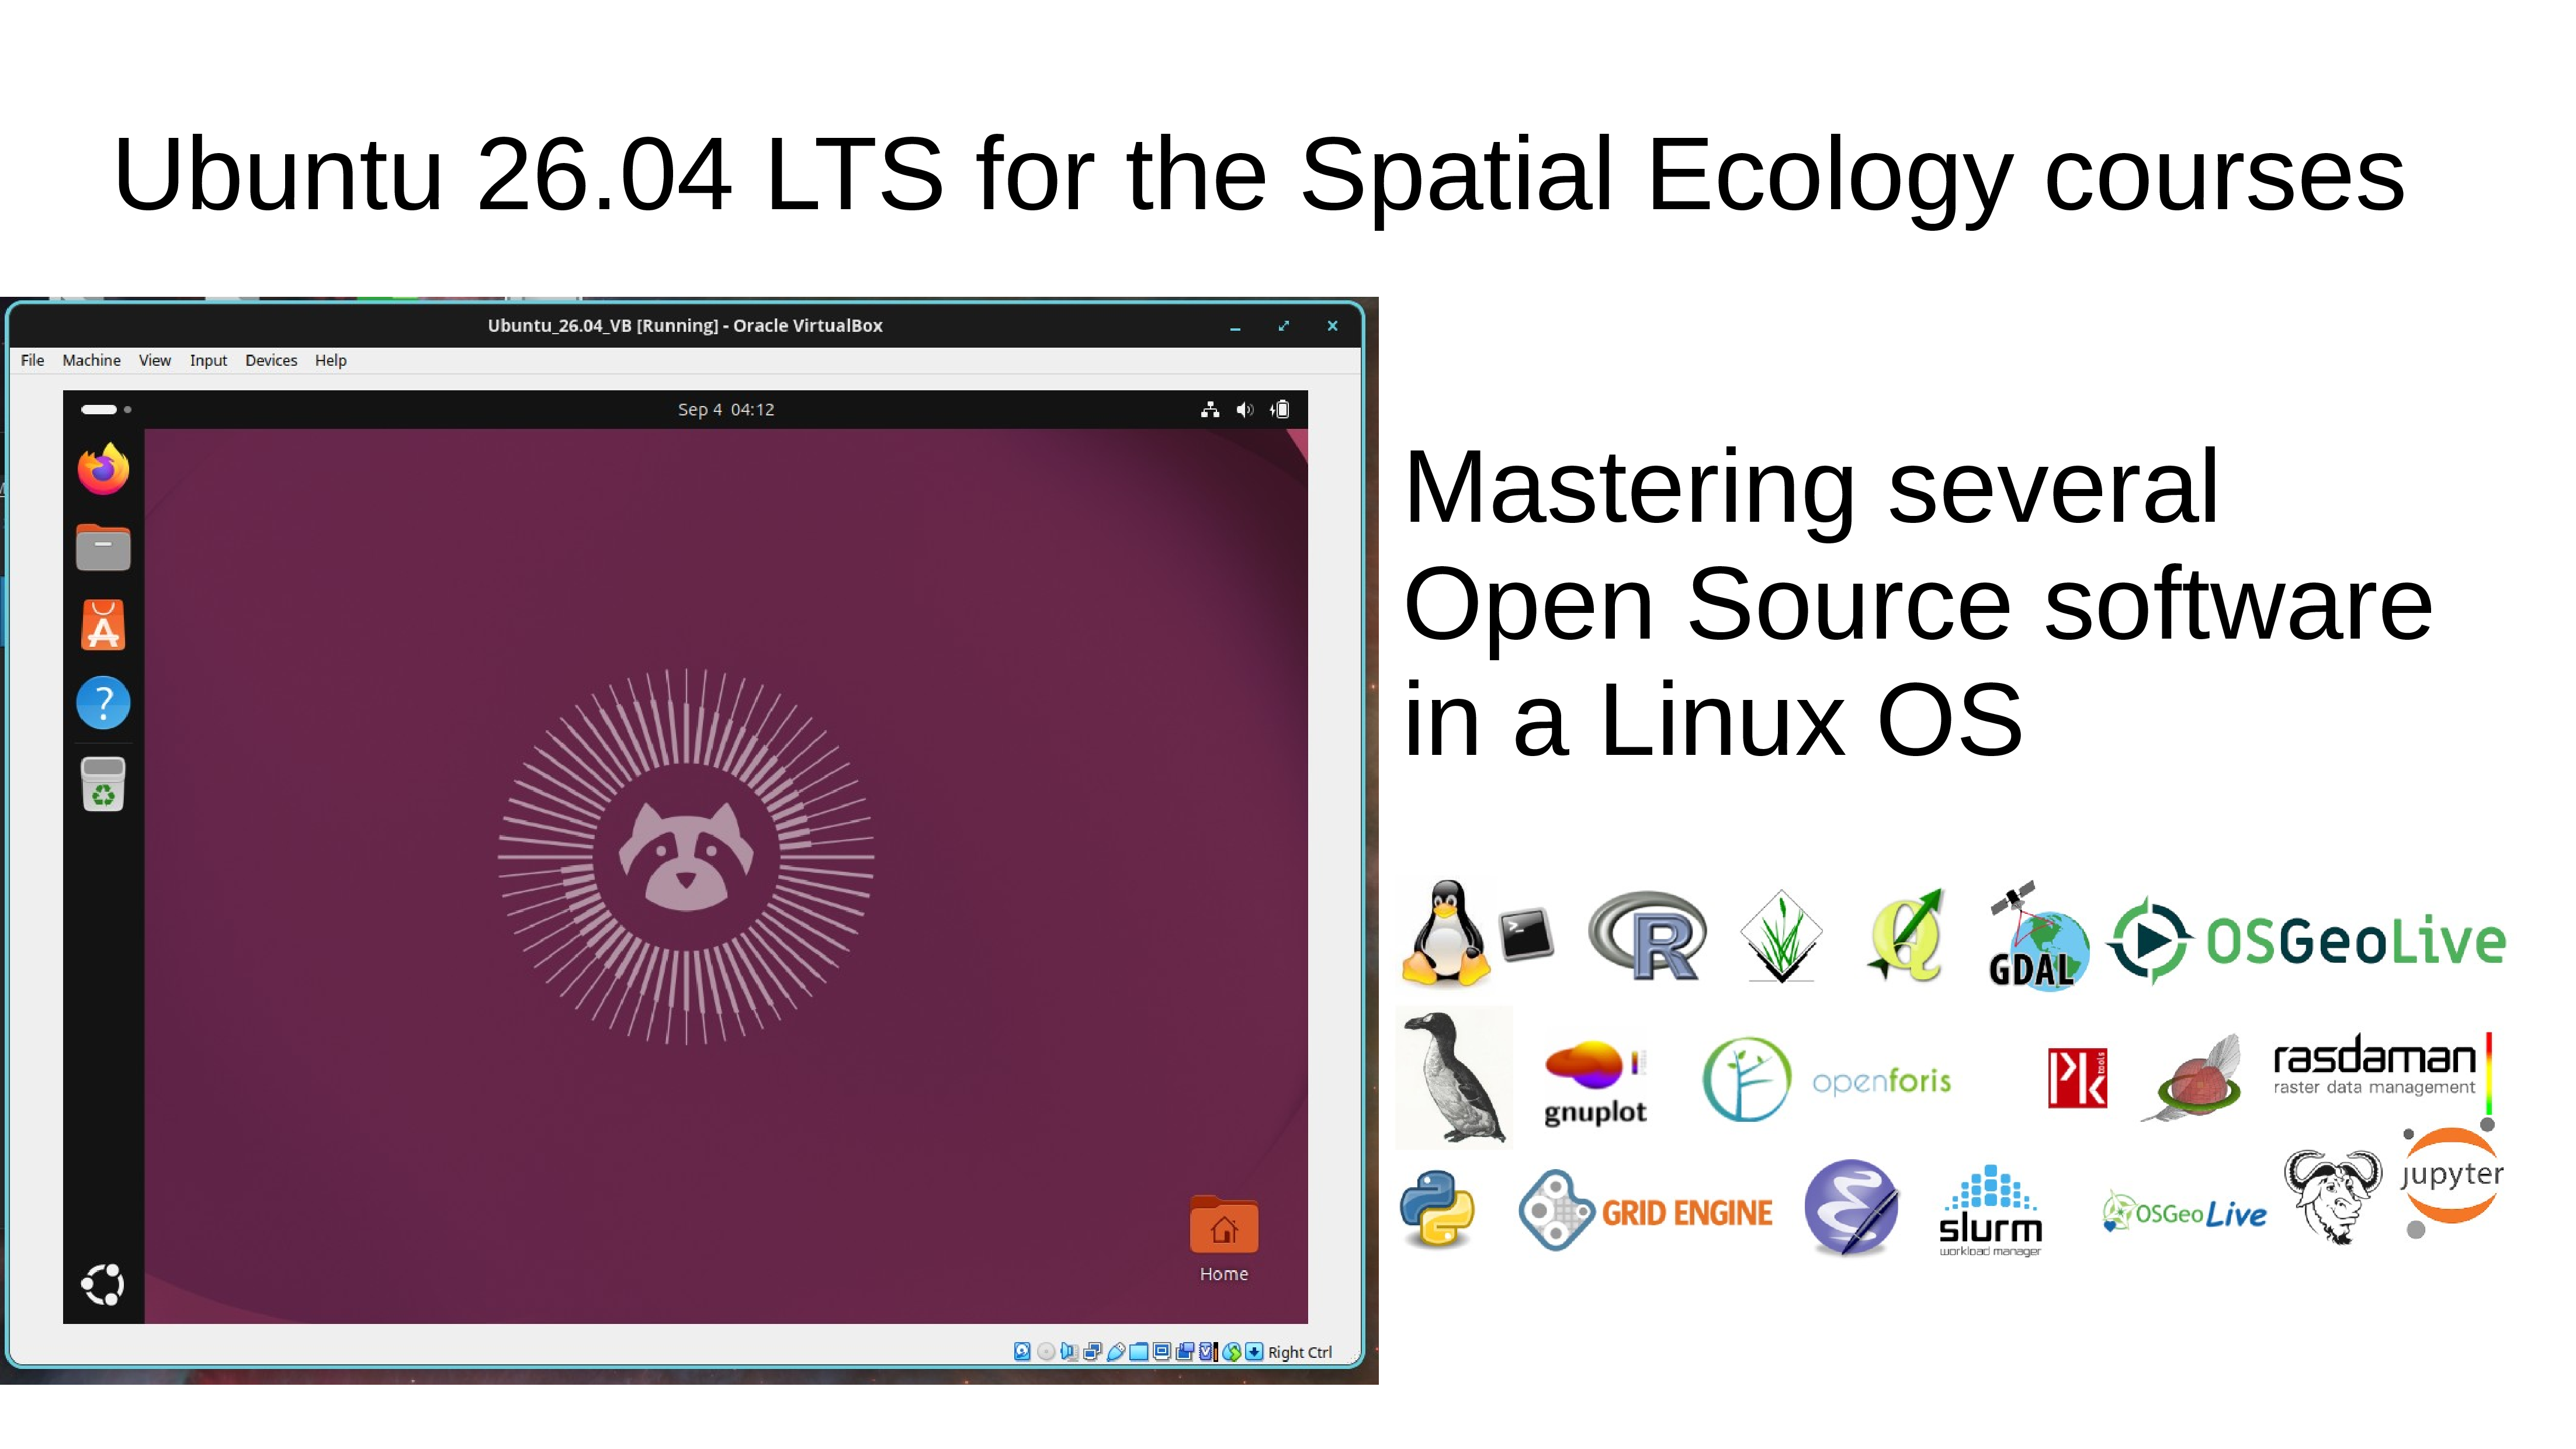
If you follow all the steps correctly the Ubuntu 26.04 LTS Virtual Machine should pop-up in the Virtual Box window showing something like this:

If the Ubuntu 26.04 LTS start with a black screen with a “kernel panic message” means that there are still some settings that are not allowing the virtualization. This page is a good tutorial for solving the issues in Windows-10 and this one for Windows-11.
Setting you keyboard layout
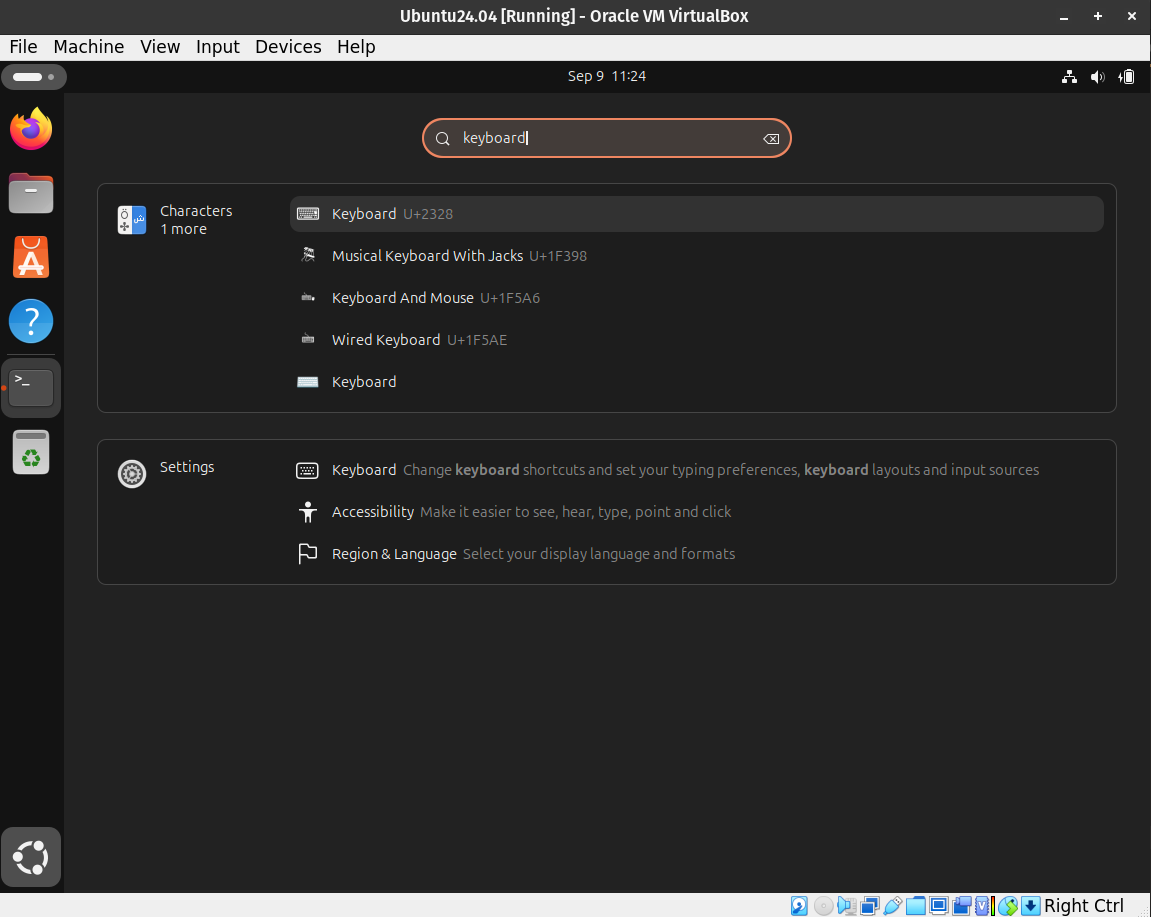
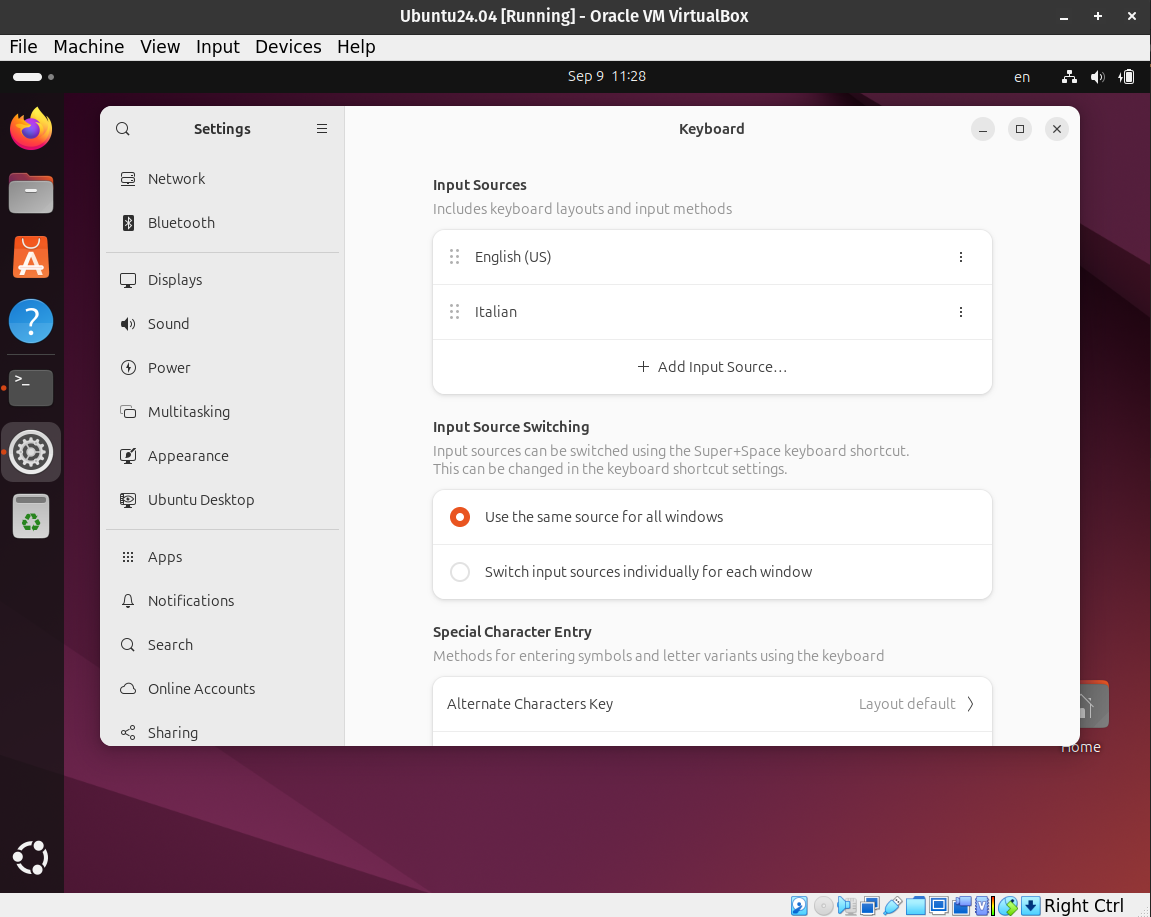
If are not use the US keyboard you have to add your keyboard layout to the bottom menubar. Therefore click on the spiral on the left bottom corner and write “keyboard” in the search box, and select in settings Keyboard.
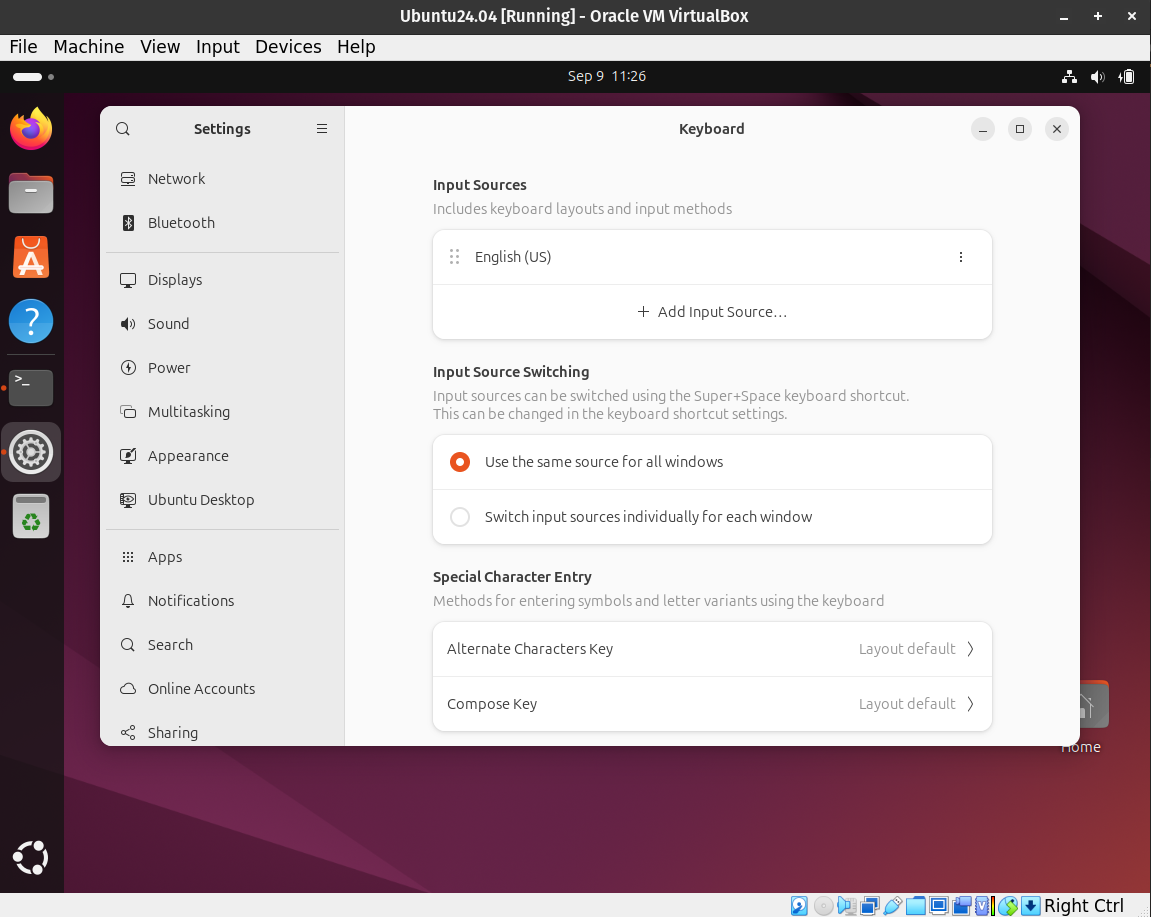
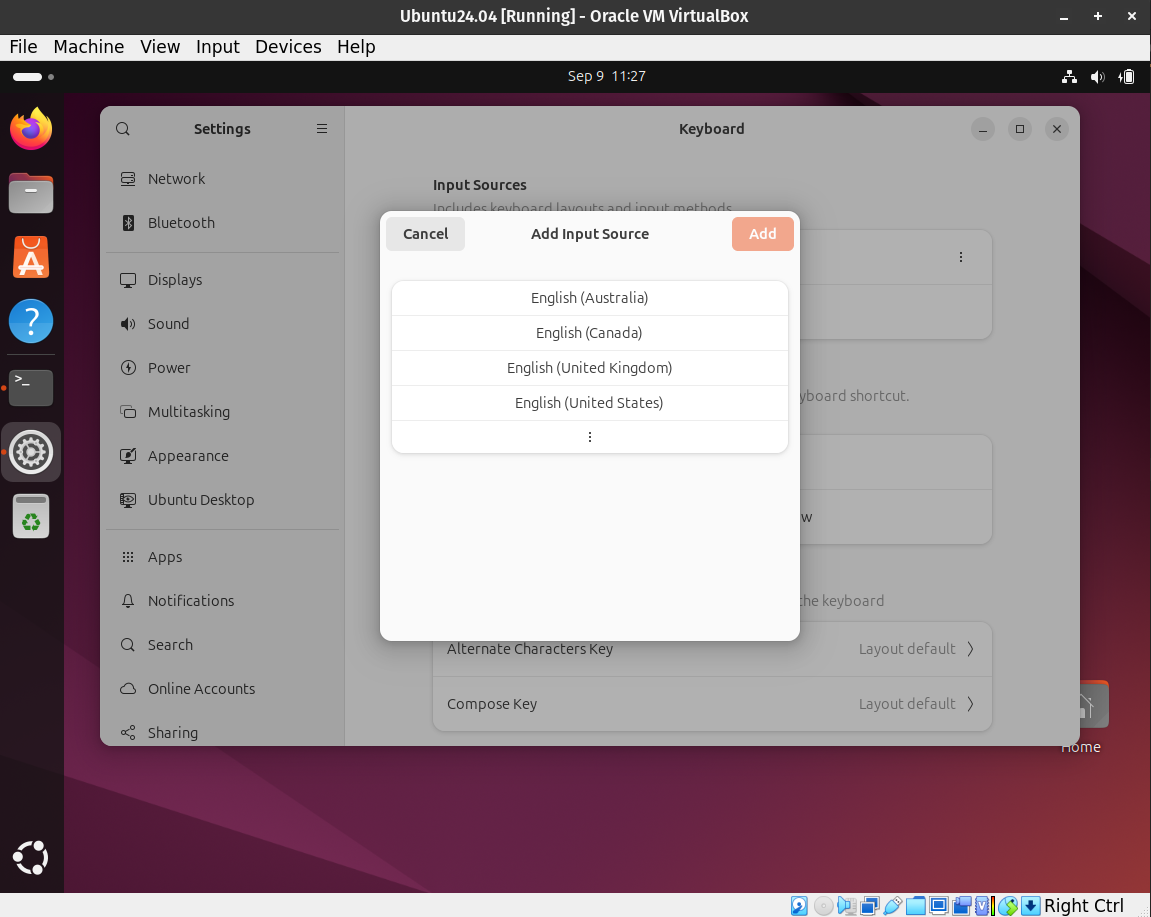
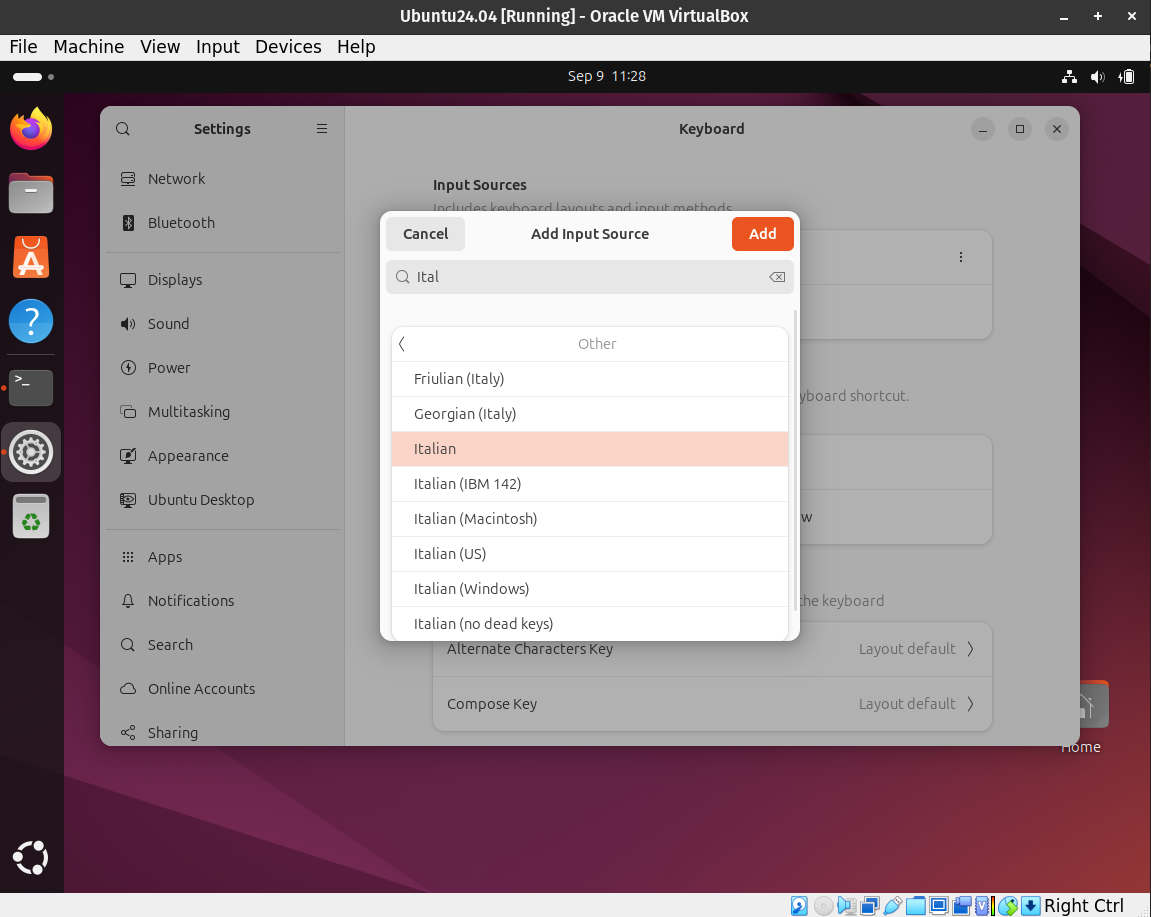
Then select “Add Input Source” > “Add” and select your keyboard layout in accordance to your country and language.
Your keyboard layout will appear as below. Move up to select it as default keyboard layout.
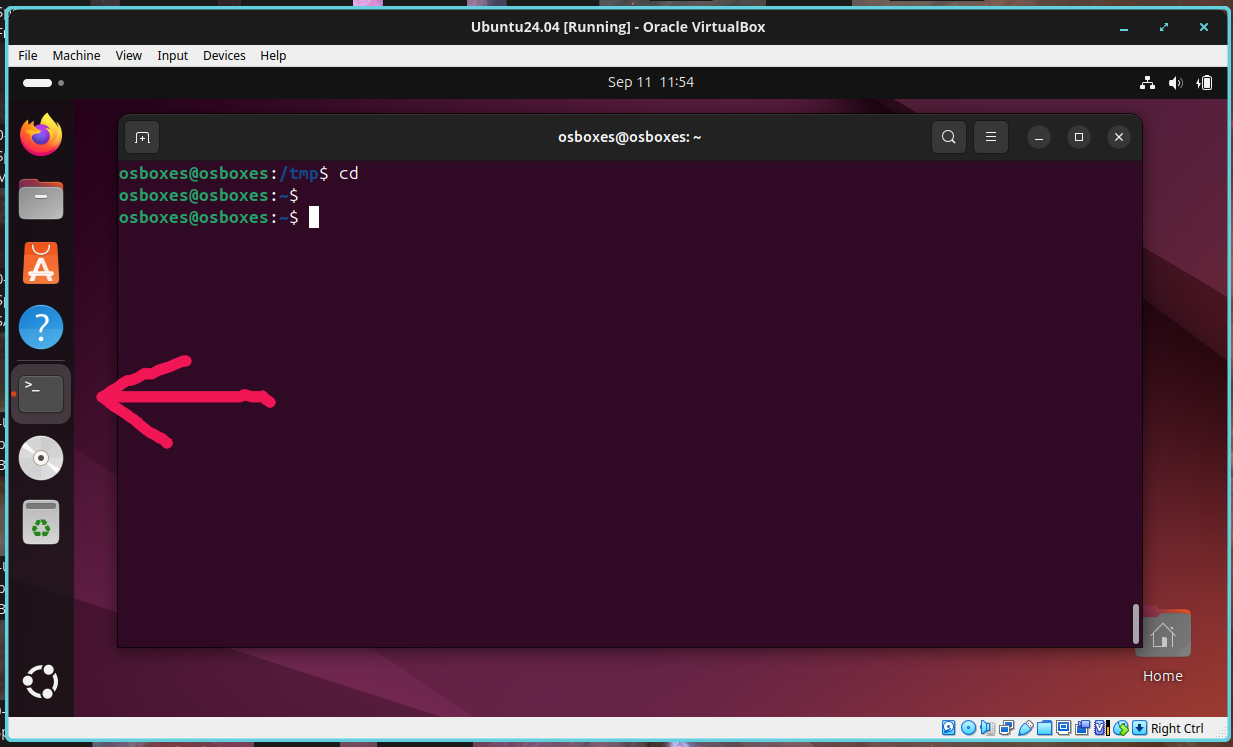
Open the terminal and test if the keyboard layout is correct.
Update the OS
The first operation after the installation is to run un update of the OS. Therefore, open the bash terminal and run line by line the following codes. The sudo password is ubuntu. For security what you type is not shown, anyway it is recorded. After typed the password press enter.
Update the OS. This operation can last few minutes. Be patient. If during the installation, some screen pop-up asking some question just accept the default option.
sudo apt update      # update the repositories
sudo apt upgrade -y  # installation of the sw
sudo apt autoremove -y
Troubleshooting screen size/resolution and shared folder of your Ubuntu 26.04 LTS Virtual Machine
Apply these concepts only if your Guest Additions do not solves screen size/resolution and shared folder
Guest Additions in VirtualBox enable better performance and functionality in virtual machines, including shared clipboard/drag and drop, shared folders, improved graphics support, and seamless app windows. Thus, it is very important that you install it correctly.
If the screen is very small try to enlarge clicking “”View -> Auto-resize Guest Display”, and if the enlargement is not working properly try to reboot.
If you still have issues after the reboot, there are mainly two options:
Install the Virtual Box guest edition with CL
Use “arandr” for setting a customized resolution
Install the Virtual Box guest edition with the CL
Sometime the Virtual Box guest edition is not installed correctly so you have to follow the procedure described below.
 # 1. Install prerequisites required to build the kernel module
sudo apt update && sudo apt install -y build-essential dkms linux-headers-$(uname -r)

# 2. Mount the CD drive (VirtualBox places the ISO here when you click "Insert Guest Additions CD Image")
sudo mkdir -p /media/$USER/VBox_GAs
sudo mount /dev/cdrom /media/$USER/VBox_GAs

# 3. Execute the installer
cd /media/$USER/VBox_GAs
sudo ./VBoxLinuxAdditions.run

# 4. Reboot your system to apply changes
sudo reboot
At this point you can reboot.
Guest Additions in VirtualBox enable better performance and functionality in virtual machines, including shared clipboard/drag and drop, shared folders, improved graphics support, and seamless app windows. Thus, it is very important that you install it correctly.
Use lsmod from the command line, as it will tell you not only if it’s installed, but properly loaded:
lsmod | grep vboxguest
vboxguest 57344 6 vboxsf # the number can be different
Use “arandr” for setting a customized resolution (probably not needed)
For some OS the “Auto-resize Guest Display” is not working properly. Therefore is possible to select a customized resolution by installing arandr. Anyway follow this route only if “Virtual Box guest edition” did not solve the problem.
Open the terminal and type:
sudo apt install arandr
then run arandr in the terminal
arandr
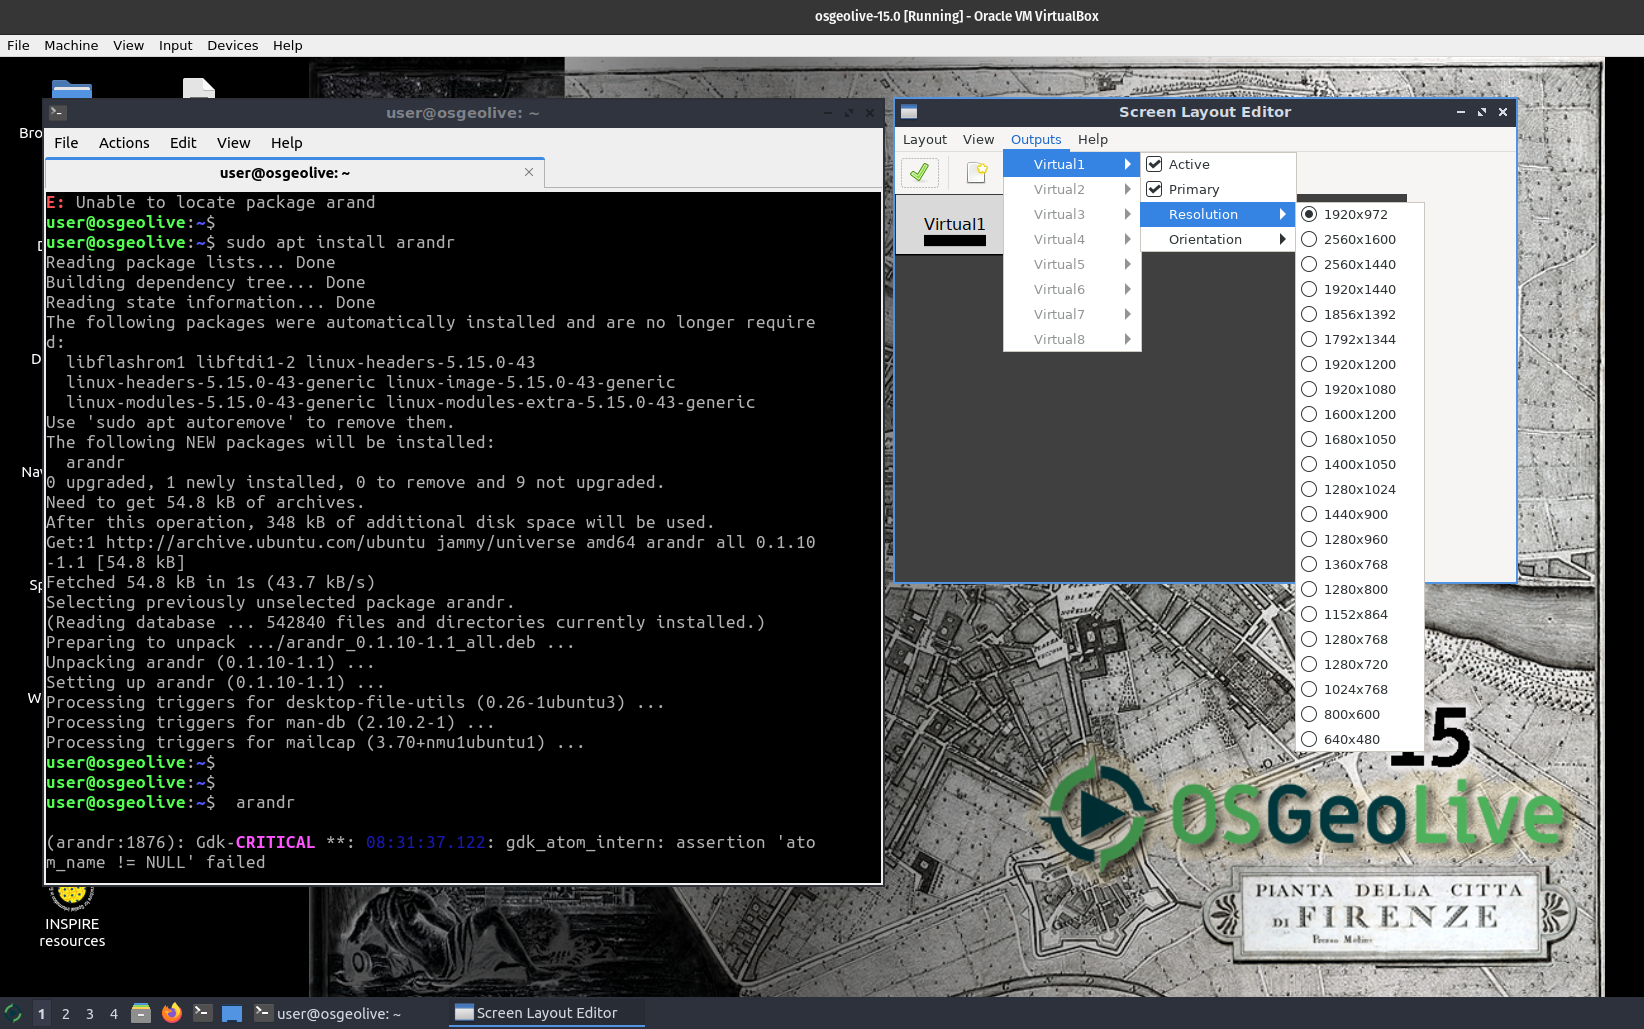
and following the below figure, select the best resolution that suitable for your screen. Select in such a way that you have the full screen cover without sliding lateral bars or white areas.
You can also save the screen settings by “Layout -> Save as” -> leaving a default directory (~/.screenlayout/)
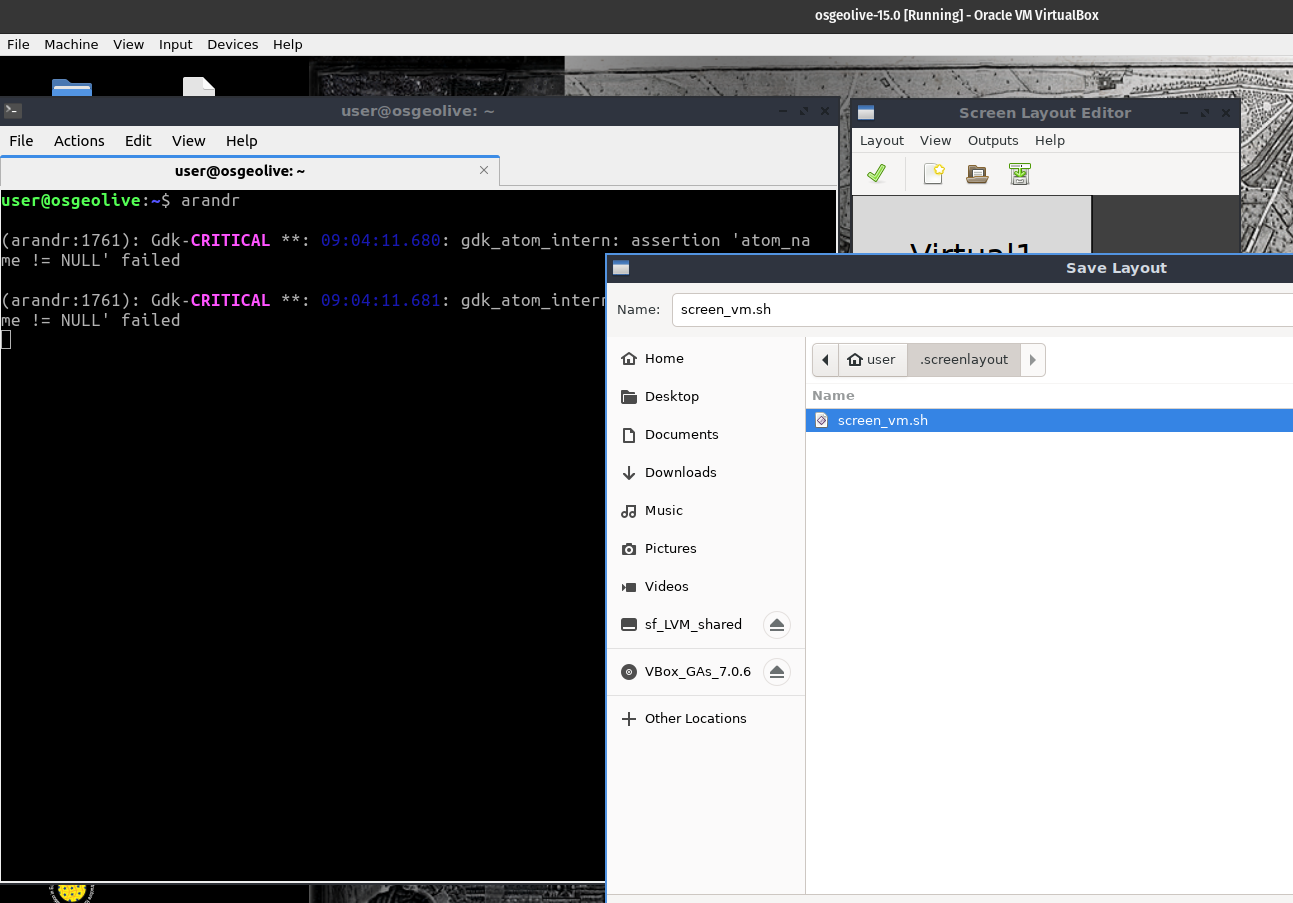
Now the script screen_vm.sh need to be run every time that you boot the machine. The easy way is to add to the ~/.bashrc. But you will need to open the terminal to allow the enlargement
echo "bash ~/.screenlayout/screen_vm.sh" >> ~/.bashrc
Populate Ubuntu 26.04 LTS with additional software
Install geo-software
At this point the Ubuntu 26.04 LTS Virtual Machine is ready to install additional software and data for running Spatial Ecology courses. In the bash terminal run the following lines
sudo apt install -y gdal-bin libgdal-plugin-grass pktools python3-rasterio \
grass grass-core grass-gui grass-doc \
qgis qgis-plugin-grass qgis-plugin-grass-common python3-qgis \
python3-geopandas python3-shapely python3-fiona python3-folium python3-xarray \
python3-gdal python3-pyproj python3-cartopy \
python3-matplotlib python3-scipy \
emacs
as before the sudo password is ubuntu.
If a prompt asks for user input, just use the arrow keys to select the default option and press Enter.
Test installed additional software
In the bash terminal run the following lines one by one. Close the window that each time pop-up.
Test gdal
gdal_translate --version
You should see the gdal version GDAL 3.12.2 “Chicoutimi”, released 2026/02/03
Test pktools
pkfilter --help
You should see the pkfilter manual instructions.
Git Settings
The below instructions together with the Git Setting for the Spatial Ecology courses YouTube video can guide along the full procedure to retrieve dataset and material for the courses.
We are going to retrieve dataset and material for the first time using git clone.
cd                                 # enter in user home
git clone https://github.com/selvaje/SE_data  # download the data
If the download succeed you should see the SE_data folder
ls -l $HOME/SE_data
Now we need copy the $HOME/SE_data to an independent directory the:
/media/sf_LVM_shared/my_SE_data
rsync -hvrPt --ignore-existing ~/SE_data/* /media/sf_LVM_shared/my_SE_data
cd /media/sf_LVM_shared/my_SE_data
The /media/sf_LVM_shared/my_SE_data is your working directory. Do not touch the ~/SE_data folder!!
Every time that we need to download more data from the git repository, follow this procedure
cd $HOME/SE_data
git pull
rsync -hvrPt --ignore-existing $HOME/SE_data/* /media/sf_LVM_shared/my_SE_data
cd /media/sf_LVM_shared/my_SE_data
Now you should be ready to follow the lectures of the Spatial Ecology courses.
Remember always to work on /media/sf_LVM_shared/my_SE_data
If for any reason the git pull commands give a synchronized error you need to remove the $HOME/SE_data and repeat the git clone and rsync operation.
cd
rm -rf $HOME/SE_data
git clone https://github.com/selvaje/SE_data
rsync -hvrPt --ignore-existing $HOME/SE_data/* /media/sf_LVM_shared/my_SE_data
cd /media/sf_LVM_shared/my_SE_data
Install jupyter lab
We are going to use jupyter lab as main scripting editor. Here how to install
sudo apt update
sudo apt install -y pipx
pipx ensurepath
source ~/.bashrc        # picks up the PATH change ensurepath just made
pipx install jupyterlab
pipx runpip jupyterlab install --upgrade jupyter-server
Test jupyter lab
jupyter-lab /media/sf_LVM_shared/my_SE_data/exercise/grass_hydro.ipynb
Get familiar with the jupyter lab GUI.